Monday, March 25, 2013

Skinny Turkey Meatballs


I thought I would start the week off by sharing this easy, tasty and super healthy recipe for turkey meatballs.

The recipe has been featured on a few diffent blogs and comes from fitness pro Jamie Eason.  You can find her HERE with a lot more recipes, nutrition and excersise advice.  Jaime makes these as "muffins" in a muffin pan, however when I tried that they got a bit stuck to the pan:(  This shouldn't be a problem in a silicone pan (which I don't have) but I just started making these as meatballs on baking sheet and have had no problems.  My only other piece of advice is not to skimp on the veggies. The turkey is so lean and doesn't have the fat to provide extra moisture so they might get a little dry.


 I love to make a batch up on the weekend and use them for my lunch throughout the week.


I usually have these with a mixed green or spinach salad.  This day I served them up with some steamed brown rice and roasted brocolli (LOOOOVE roasted veggies!!).


Ingredients:
* 2 lbs ground turkey (or chicken)
* 3 egg whites
* 1 cup quick cooking oats
* 1/2 tsp ground cumin
* 1/2 tsp dried thyme
* 2 tsp dry yellow mustard
* 2 tsp black pepper
* 2 tsp chipotle pepper spice
* 1 tsp salt
* 2 tbsp garlic powder (2 cloves minced)
* 1 small onion (finely chopped)
* 2 celery stalks (finely chopped)
* 1/2 cup mushrooms (finely chopped) optional
(I usually make half this recipe)
Directions:
1. Preheat oven to 375 degrees.
2. Spray muffin pan with canola or olive oil or line a sheet pan with parchment or non-stick foil.
3. Mix all your ingredients together in one large bowl.
4. Roll the mixture into balls and place in muffin pan. Muffins should be about the size of a racquetball. 
5. Bake for 30-40 minutes. (I turn mine half-way during cooking if on a sheet pan)
Source:  adapted from Jamie Eason

Thursday, March 21, 2013

Jelly Bean Easter Egg Cupcakes

Here is a sweet, simple and fun dessert  for your Easter celebration.  I made these for my daughter's preschool celebration and everyone seemed to love them.  

All you do is take your favorite vanilla cupcake recipe (or use a box mix to keep things simple).  Then add some swirly frosting to mimic Easter grass and top with speckled jelly bean eggs.


 I found my speckled jelly bean eggs at Target but I've also seen them at the grocery store.


Use the "grass" piping tip to achieve the Easter grass look.  If you do not own one of these you can find them at a store like Michael's ...or just spread some frosting on with knife (nobody will mind...:))

A look at our day:

HAPPY EASTER!!


Ingredients:

Vanilla cake mix (homemade or from a box)
Buttercream dyed green (homemade is best)
Jellybean eggs


Directions:

Bake the cupcakes according to directions.  Let cool completely.  Make the buttercream.  

Using the "grass" frosting tip, pipe swirls onto the cupcakes.  Top with jellybean eggs.  Enjoy!


Source:  Chef Mommy original


Saturday, March 16, 2013

KitKat-M&M Cake


A few weeks ago, we celebrate my son's 8th birthday.  8 already...still kinda mind boggling for this mama :/ Anyway, this year I decided to just keep things simple (in theory anyway) and have a few of his friends over for dinner (he picked the menu) and cake.  

My little foodie picked homemade buffalo wings, Cesar salad, mozzarella sticks with marinara and pizza of course.  So when it cake time to pick a cake, I decided to keep things simple.  

I had seen this KitKat/M&M cake on the blogosphere for some time and thought it looked fun and would be perfect for this party. This cake doesn't require too much work to achieve the overall fun look.  I used a good chocolate boxed cake mix, make homemade chocolate frosting (just b/c I hate the taste of canned frosting) and then added the KitKat's and M&M's.  


Everyone got a kick out of the cake and one serious sugar rush!

Ingredients:
Cake - (your favorite; homemade or from a box, chocolate, vanilla, etc.)
Chocolate frosting- (your favorite; homemade or canned)
KitKat- broken into 2 piece sections
M&M's
Ribbon (to tie around the cake)

* The amount of ingredients you'll need really depends on what size cake you are making.


Directions:
1.  Bake the cake according to recipe and let cool completely.  Slice off the tops of the cake layers and frost the cake completely.
2.  Carefully press the Kitkat bar sections into the frosting, all around the cake.  Ideally, you'll want a 1/2  rim on the top of the cake to hold all the M&M's in place.
3.  Pour the M&M's on the top of the cake.
4.  Wrap decorative ribbon around the cake.


Source:  Inspired by multiple sources on the web


Wednesday, February 27, 2013

Slow-Cooker Italian Chicken

Looking for a super easy, fool-proof slow-cooker family meal?  How about this classic: Italian chicken!

All you need is a few ingredients and your trusty old slow-cooker.  Pour everything in and forget about it for a few hours.  The perfect meal for those busy weekdays and one the entire family will love.  The chicken comes out creamy and tender.  I served this over brown rice, broccoli on the side and a piece of garlic bread--YUM!


Ingredients:

2-4 boneless skinless chicken breasts (I used chicken tenders cut into bite sized pieces)
1 (8 oz.) package cream cheese, softened
1 can cream of chicken soup
1 pkg. Italian dressing seasoning
1/4 cup water or chicken broth
Rice or pasta
Directions:
Place chicken in a slow cooker. Mix softened cream cheese, cream of chicken, water or broth and Italian Seasoning together and pour evenly over chicken. Cook on high for 4-6 hours or until chicken is fully cooked and tender.  Serve over rice or pasta.


Source:  Adapted from Chef-in-Training


Wednesday, February 13, 2013

Valentine's Day Heart Sugar Cookies


Recently, I had the pleasure of spending a Saturday night bonding with my friend ,Vanessa, over a few glasses of wine and while decorating these Valentine's day cookies.  Vanessa is a fantastic cook and baker (amongst other things) and we had both talked about how we should get together one night to share baking and decorating tips.  After a few attempts to coordinate a date, we were finally able to get together.  It was so great to catch-up with her and I was so happy with how these cookies turned out!


 My friend, Vanessa's gorgeous chocolate heart cookies.  Simply beautiful!!


The classic sugar cookie recipe and royal icing recipe is listed below.  To make the heart design on the  cookies, start by piping a border of royal icing on your cookie and flood the center with same or coordinating color.  Then immediately (if you wait too long it won't work as well) add dots to the border area of the cookie.  Finally, drag a clean toothpick through the dots and you'll make this lovely connecting hearts design.


Sugar Cookies

Ingredients:

3 cups all-purpose flour
1 teaspoon baking powder
1 cup (2 sticks) unsalted butter, room temperature
1 cup sugar
1 large egg
1 1/2 teaspoon good quality vanilla extract

Parchment paper or Silpat mat

Directions:

-In a medium bowl, stir together the flour and baking powder and set aside.
-In the bowl of an electric mixer, using the paddle attachment, cream together the butter and sugar until light and fluffy. This should take about 3 minutes.
-Add the egg and vanilla and beat another minute or so.
-Add the flour mixture slowly. (Be careful not to add too much at a time or you will have a snowstorm of flour.)
-Blend until all of the flour is incorporated and the dough begins to pull away from the sides of the bowl.
-Take the dough out of the bowl and place it on a piece of parchment paper. 
-Using your hands, knead the dough a few times.
-Place the dough in a large plastic (Ziploc type) bag and refrigerate for about 2 hours. If you want to speed up the chilling process, place the bag of dough in the freezer for about 20-30 minutes. Just don't forget it in the freezer, or it will become to firm to work with (and then you'll have to wait for it to thaw). 
-When it's almost time to remove the dough from the refrigerator (or freezer), preheat oven to 350 degrees (F).
-When the dough has chilled and is firm, take out about half of the dough, leaving the rest in the refrigerator (until your ready to work with it).

Royal Icing

Ingredients: 
4 Tablespoons Meringue Powder (I use Wilton Brand)
4 cups (about 1 pound) powdered sugar
6 Tablespoons warm water
1 teaspoon clear vanilla extract


Directions:
Beat all ingredients until stiff peaks form. 
*Make sure all bowls and utensils are totally grease-free or your icing will never reach proper consistency.
Spoon some of the thick white icing into individual bowls and add coloring.  Then divide each colored batch in half.  Carefully, add and stir warm water to the icing to get a think and a thin "flooding" consistency.  Decorate your cookies.  Cookies will need 12-24 hours to dry completely.

Source: Glorious Treats


Tuesday, February 12, 2013

Small Batch Vanilla Cupcakes (makes 4 cupcakes)


Not so long ago I was having a major cupcake craving (ever get one of those?) and wanted to bake a batch but realized I had a little problem.  All the recipes I have make a full batch of either 18 or 24 cupcakes.  That is great in most situations and cupcakes tend to freeze very well, but having that many buttercream topped goodies within easy reach is just not a good thing for this girl (read: no self control) ;)


So, when I came across this recipe I knew my problem was solved!  A perfectly simple, vanilla cupcake and buttercream recipe that only yields enough batter and frosting for 4 cupcakes (or 8 minis)...Yes!  I slightly adapted the recipe by using cake flour to lighten the cake (all purpose flour will work too) and heavy cream instead of milk to make the frosting a little richer and it worked beautifully.  

The hearts were made out of fondant which I dyed pink and cut out with a small heart cookie cutter.

So, if you are still looking for a special treat for your Valentine's day make these!


Vanilla Cupcakes (yields 4 cupcakes)
2 egg whites
4 Tbs. sugar
4 Tbs. butter, melted and cooled
2 tsp. vanilla extract
1/2 cup  cake flour (can sub AP flour if needed)
1/2 heaping tsp. of baking powder
2 pinches of salt
3 Tbs. milk
1.  Line a cupcake pan with 4 cupcake liners.  Preheat oven to 350 degrees.

2.  In large bowl, whisk together the egg whites and sugar.   Stir in the melted butter and vanilla.


3.  All at once, stir in the flour, baking powder and salt.  Keep stirring until everything is smooth and well-combined.  Add milk and stir until incorporated into the batter.


3.   Fill each cupcake liner with batter.  I love my large cookie scoop for this. If you don’t have one, simply divide the batter evenly between the 4 cupcakes.


4.  Bake  12-14 minutes.  The cupcake should pass the toothpick test.  Cool Completely.
Vanilla Buttercream (frosting for 4 Cupcakes)
4 Tbs. butter, room temperature
1/2 tsp. vanilla
2-3 tsp. heavy cream
1 cup powdered sugar
1.  Beat or stir briskly the butter,  milk and vanilla.
2.  On low, or slowly, add powdered sugar 1/4 cup at a time.  Incorporate your powdered sugar before adding the next installment.  Add more milk if needed.
3.  Pipe onto cupcakes and eat!
Cupcakes are best the day they are made.  Refrigerate if you will not be eating them in about 6-8 hours.


Source:  WiskTogether

Monday, January 28, 2013

NY Strip Steak with Garlic Herb Butter


This one is for all you meat lovers out there.  Not much of a recipe per say, but a reminder that a few simple ingredients and technique equals a restaurant quality, mouth watering, juicy steak that all will love.

If you are not familiar with this cut of meat, here is a little info:


Cut from the strip loin part of the sirloin, the strip steak consists of a muscle that does little work, and so it is particularly tender, though not as tender as the nearby ribeye or tenderloin (fat content of the strip is somewhere between these two cuts, allowing for a flavor profile to match). Unlike the nearby tenderloin, the strip loin is a sizable muscle, allowing it to be cut into the larger portions favored by many steak eaters.


When still attached to the bone, and with a piece of the tenderloin also included, the strip steak becomes a T-bone steak or a Porterhouse steak as the latter term is understood in the United States and Canada.
The Kansas City strip steak usually has a portion of the bone connected, whereas the New York strip steak is boneless. 


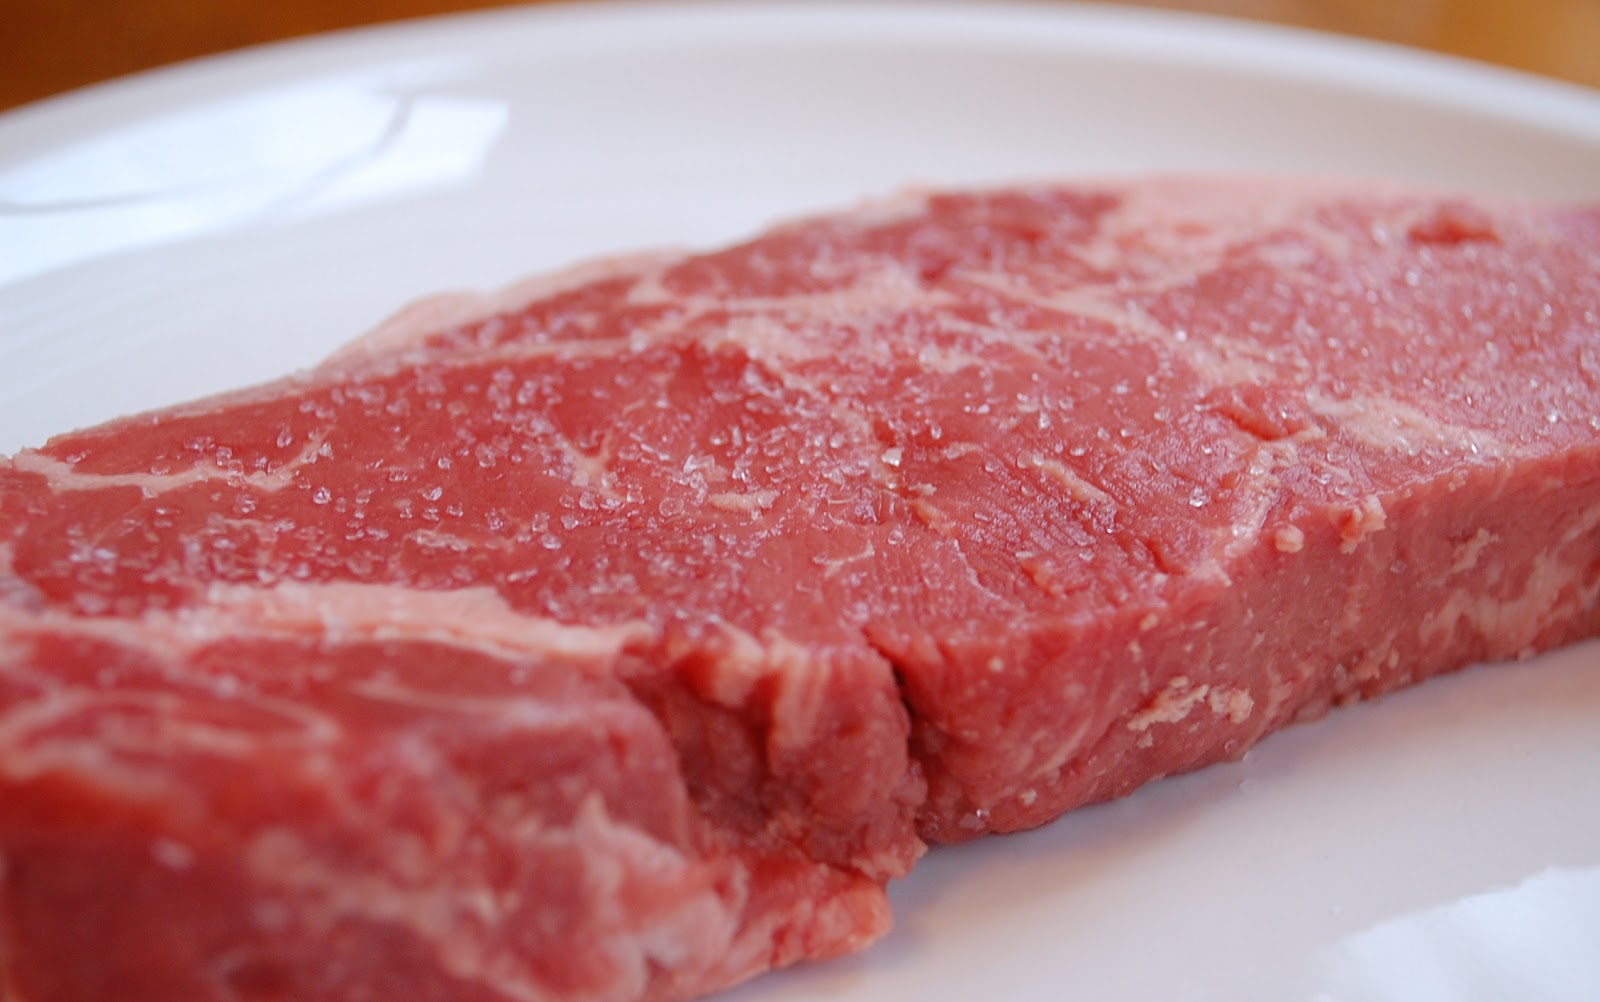
Now, the most important step in cooking this steak is to let it sit at room temperature for a bit of time.  Read: do not slap this on the grill straight from the fridge.  After that, you'll want to sprinkle on some Kosher or Sea salt to each side of the steak (do not use table salt here).  You want to let the salt melt into the steak, which will in turn tenderize it.


The course salt is working it's magic!
After, the salt has melted into the steak, add it to an oiled, very hot grill (I used a grill pan for this steak). The length of time depends on the thickness of your steak but here is a general cooking guide:

1” Steak   First Side / Second Side

Rare:  5 minutes / 3 minutes
Medium:  6 minutes / 4 minutes
Well:  8 minutes / 6 minutes


The garlic herb butter is the cherry on top, so to speak.  Start with softened salted butter, add some finely minced garlic (garlic press is best here), some fresh parsley and blend it all together.  


You should refrigerate the butter until you need it for the steak.  You can keep the remain butter in the refrigerator for about a week.

I served this steak with some beautiful roasted asparagus.

Salt, pepper and EVOO in a 400 degree oven for about 15 minutes.  Turn asparagus over  halfway through cooking.

A perfect tender and juicy steak.

Ingredients:

Steak
2-4 NY Strip Steaks (thicker cut is best)
Kosher salt or Sea salt

Garlic Herb Butter
4 TBSP salted butter, softened
1-2 garlic cloves (finely minced)
1 TBSP parsley (finely chopped)

Directions:

Remove steaks from fridge and let sit at room temp for 15-20 minutes.  

In the meantime, prepare the butter by combining all the ingredients.  Refrigerate until ready to use.

Sprinkle steaks (generously) with salt and let salt melt into the steak, about 8-10 minutes.  Turn steaks and repeat on other side.  Lightly brush a grill pan with canola oil and heat over high heat.

When grill pan is properly heated add the steaks and cook according to your desired doneness (see guide above).  Once steaks are cooked remove from grill and let rest for 5-8 minutes.  Pat each steak with about a teaspoon of the garlic butter and serve immediately.


Source:  Chef Mommy original

Monday, January 21, 2013

Broccoli Cheddar Soup


Well, it looks like it's going to be another pretty cold week here in the DC area.....brrrrrr!  The good news?  It's perfect soup weather and I've got a terrific recipe to share with you.  This broccoli cheddar soup is filling, comforting and so delicious.

This soup reminds me a bit of Panera's broccoli cheddar soup.  It's creamy and cheesy made with lots of fresh broccoli and carrots.  I serve it with a soft roll or some crusty bread and dinner is done!  If you end up with any leftovers (we usually don't) it's just as yummy the next day.

So, stay warm...make soup...and have a great week!!


Ingredients:
6 tbsp. butter, divided
¾ cup onion, chopped
1 cup carrot, chopped or shredded
4 cups small broccoli florets
3 cups low-sodium chicken broth
½ tsp. onion salt
½ tsp. garlic powder
4 tbsp. flour
2 cups milk
2 cups shredded sharp cheddar cheese
Freshly ground black pepper

Directions: 
In a large stockpot or Dutch oven, melt 2 tablespoons of butter over medium heat.  Add the onion to the pan and sauté until tender, about 5-7 minutes.  Add the carrots to the pan and cook a couple minutes more.  Stir in the broccoli, chicken broth, onion salt and garlic powder.  Bring the mixture to a boil, then reduce the heat to a simmer.
In a medium saucepan, melt remaining butter.  Add the flour and cook for 1-2 minutes until golden brown, whisking constantly.  Whisk in the milk and cook until the mixture thickens and bubbles, about 5 minutes.  Once the mixture has thickened, whisk in the cheese until completely melted.  Remove from the heat and add the cheese sauce to the soup pot.  Allow to simmer until warmed through and broccoli is tender.  Season with salt and freshly ground pepper to taste.  If desired, puree the soup with an immersion blender for a smooth texture.

Source: Annie’s Eats 

Friday, January 11, 2013

Homemade Egg McMuffin


I've recently been on a quest to find quick, healthy breakfast options.  I had tried this overnight oatmeal recipe but the results were just..."meh".  When my son mentioned how much he loves breakfast sandwiches (they do breakfast for lunch at school some times) and asked why I don't make them anymore.  That was a good question and I knew it was time to change that.

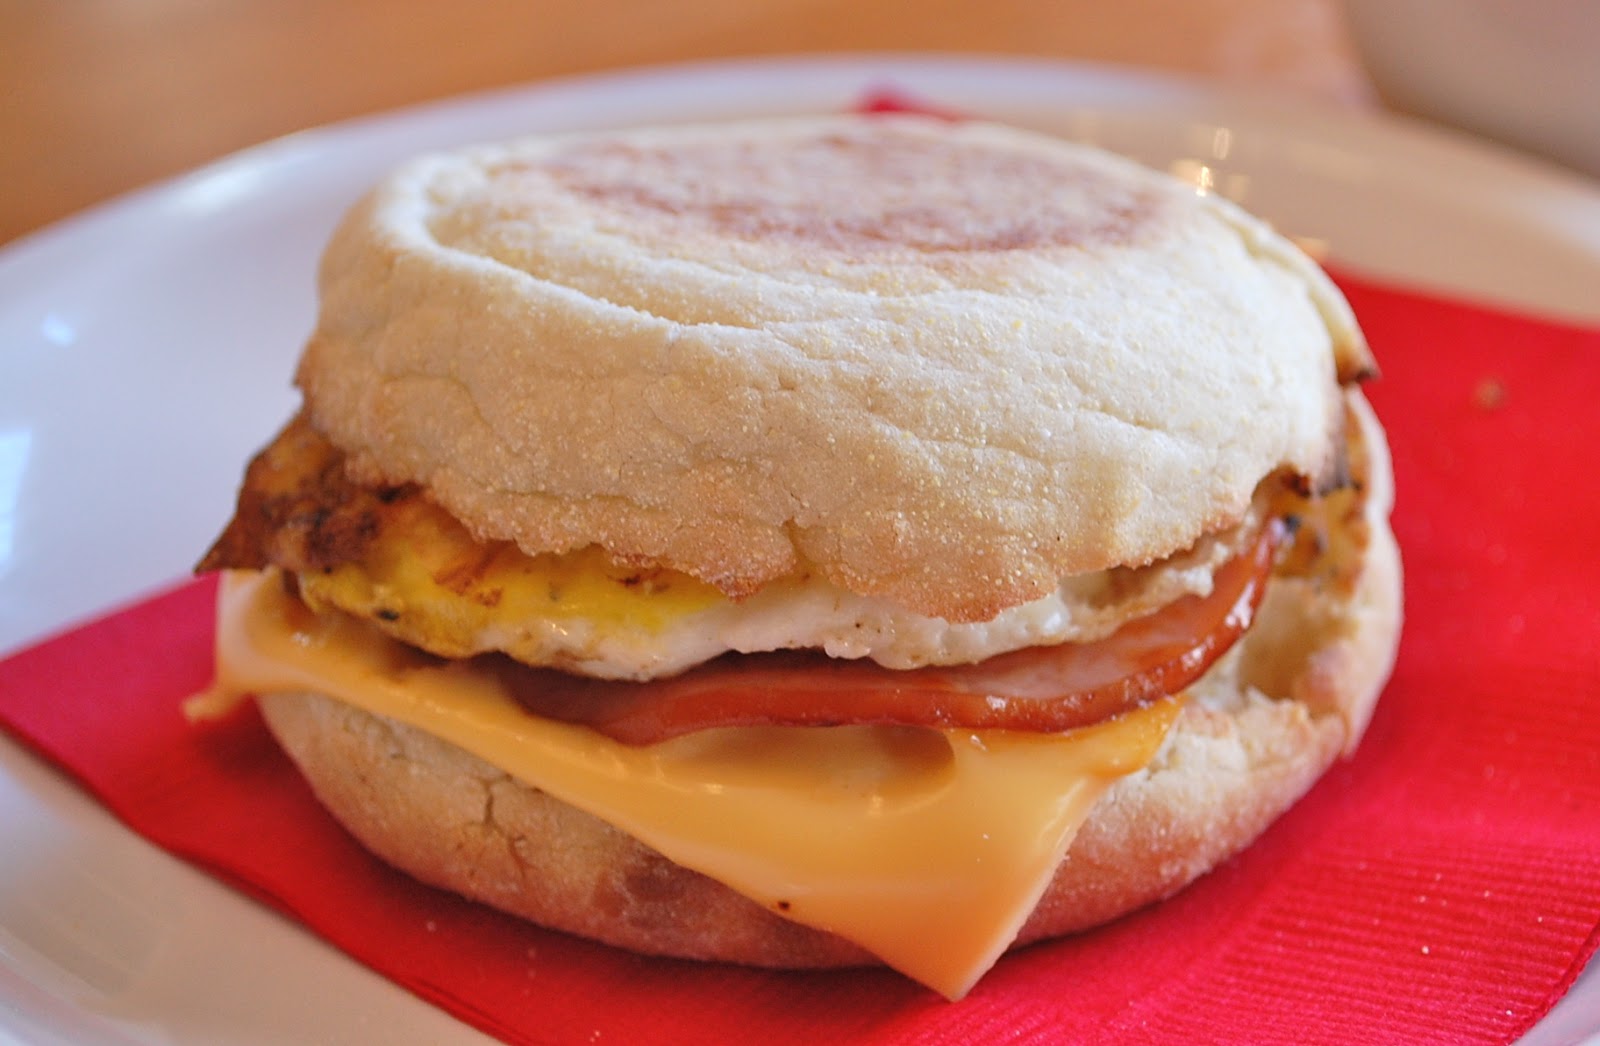
This breakfast sandwich has all of the ingredients of a McDonald's classic egg mcmuffin.  However, I think this home made version taste a lot better and is much healthier too.

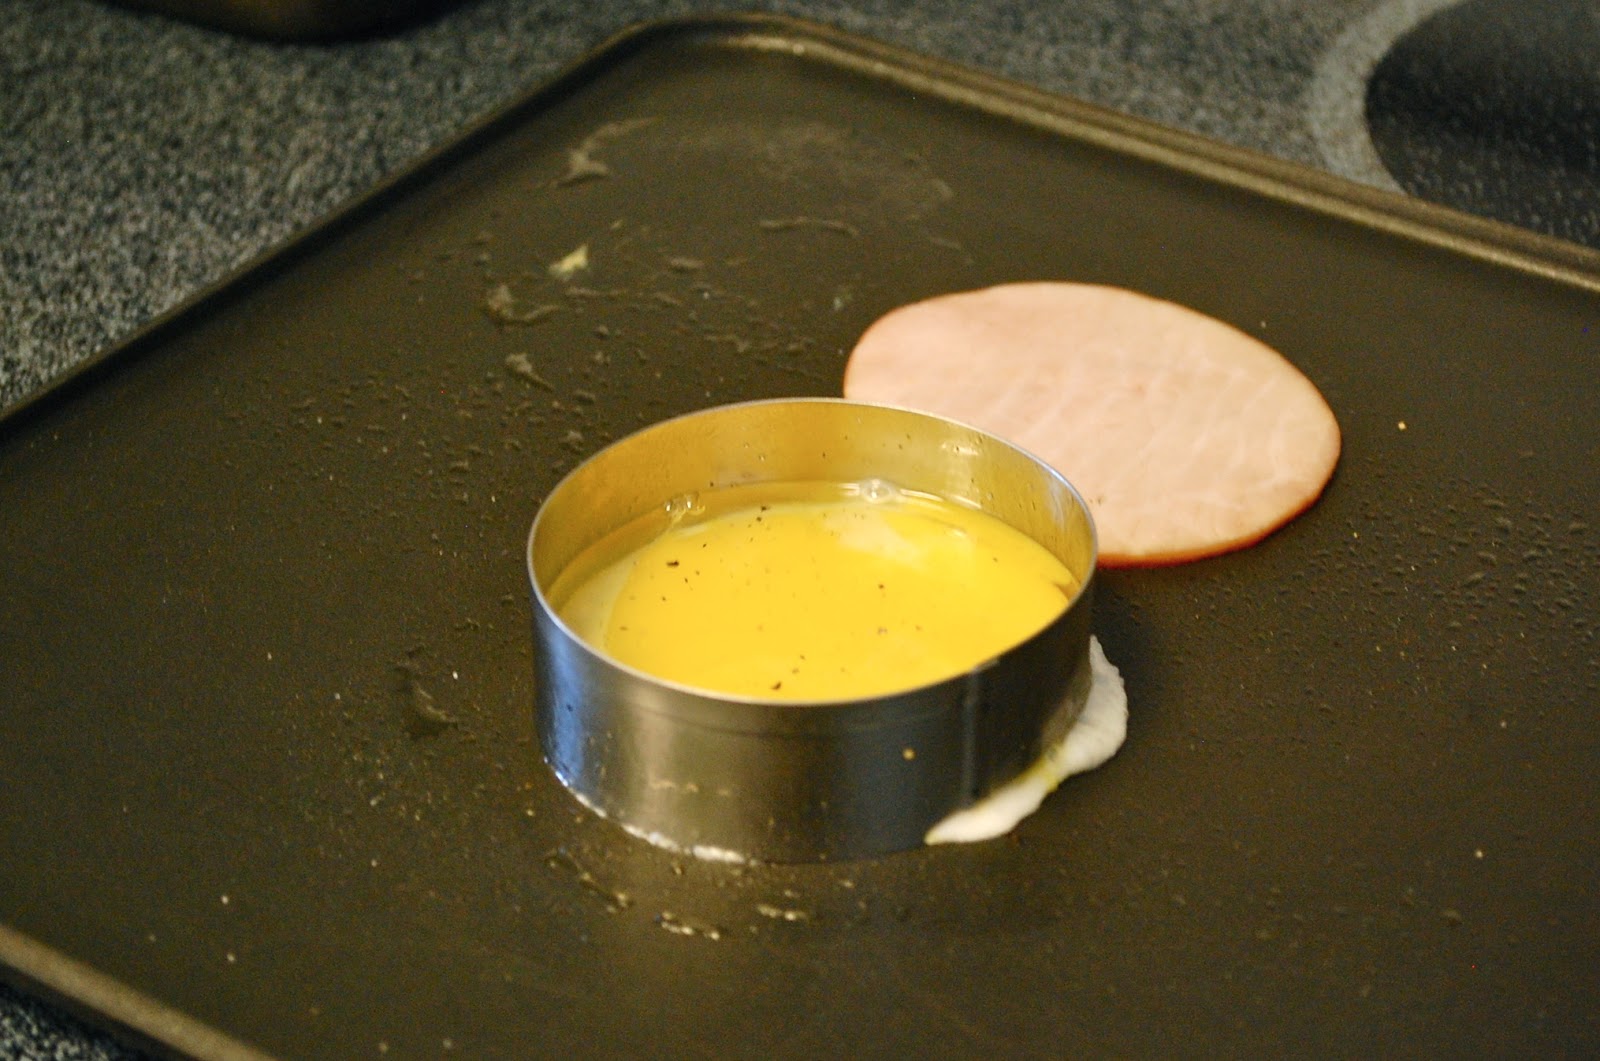
I think the biggest key to making this copycat version at home is to make the egg round.  I have used a cookie cutter and biscuit cutter to do this and it works well.

The round ring mold (ex. a round cookie cutter or biscuit cutter) makes that perfectly round egg.  Don't worry about a little bit of the egg running on to the pan.

Get some coffee brewing too!

You can make this sandwich even healthier by using only egg whites, light butter and 2% cheese.  It will still be filling and delicious.

It's going to be a great morning!

INGREDIENTS:


1 English muffin (split)
1 large egg (or 2 egg whites)
1 slice Canadian bacon
1 slice yellow American cheese (regular or 2%)
1/2 Tbsp butter, softened
cooking spray (such as Pam)
salt and pepper

DIRECTIONS:

Pop the English muffin into a toaster and set it to the desired crispness level.  Crack the egg into a bowl and give it a quick whisk with a fork to break up the yolk.
Spray a griddle pan or nonstick skillet with cooking spray and heat over medium-high heat. Cook the bacon for 2 to 3 minutes in the pan.  Spray the round cutter with cooking spray also and add to the pan with the bacon.  Pour the egg into the round cutter, season with salt and pepper.  Flip egg over once edges have set.
Once the English muffin is toasted, lightly butter both halves and add cheese.  Microwave for 5 seconds to slightly melt the cheese.   Layer on the egg, bacon, and the other half of the toast. Serve immediately.

Source: Adapted from the http://www.thedailymeal.com/mcdonalds-egg-mcmuffin#ixzz2HgFMLJZh

Monday, December 24, 2012

Gingerbread Cookies


Santa is almost here and I know this is posted very last minute but I just had to share :)  I love this simple and classic recipe for gingerbread cookies.  I found the recipe and design idea on this wonderful blog, Glorious Treats.  


I made these for my daughter's Christmas celebration and everyone really enjoyed them.  Bonus with making these...your kitchen will smell like Christmas!


My daughter with her wonderful (and beautiful!) teacher.  Below, with some of her best friends from preschool.  


These cookies also make great ornaments.  To make them an ornament, use a straw to make a hole in the cookies before baking.  Then just add a little ribbon...totally cute!!


Merry Christmas to All!!


Gingerbread Cookies
Ingredients
6 cups all-purpose flour
1 Tablespoon baking powder
1 Tablespoon ground ginger
1Tablespoon ground cinnamon
1 teaspoon ground nutmeg
1 teaspoon ground cloves
1/4 teaspoon ground black pepper
1 cup butter
1 cup molasses
1 cup brown sugar
2 eggs
2 teaspoons vanilla extract
Cinnamon drops (optional)
Directions
1.  In a large bowl, gently stir together flour, baking powder, and all spices. Set aside.
2.  In the bowl of your electric mixer (or other large bowl), beat butter until smooth.  Add brown sugar, molasses, eggs and vanilla.
3.  Gradually stir in the dry ingredients until they are fully incorporated.
4.  Divide the dough into 3 pieces, and flatten into rounded disk (about 1 1/2 inches thick).  Wrap dough in plastic wrap and refrigerate for at least 3 hours.
5. When dough has chilled, preheat oven to 350*F.  On a lightly floured surface, roll the dough out to desired thickness (1/4- 1/2 inch thick).  Cut into desired shapes with cookie cutters.  Place cookies at least 1 inch apart on a baking sheet lined with parchment paper or a Silpat type liner.  If the dough is too sticky or soft to work with, put it in the refrigerator or freezer for a few minutes to firm up.  Press cinnamon drops into the cookies if using.
6.  Bake for 9-12 minutes (depending on the size of cookies).  Cool slightly on cookie sheet, then move to a cooling rack to cool completely.
7.  Frost with royal icing, if desire. 

Source:  Glorious Treats

Friday, December 21, 2012

Christmas Sugar Cookies 2012- Polar Bears


I wanted to share the decorated sugar cookies I made a few weeks ago.  These were made for my neighbor's annual cookie exchange party and I just loved how they turned out!  Click HERE to view last year's holiday themed sugar cookies.

I have been working on a step-by-step video and while it won't be ready by Christmas, I hope to post it soon.  In the meantime, I hope these provide some inspiration and the classic recipe is listed below.


This years cookie exchange had so many delicious cookies, including chocolate rum balls, buttered rum meltaways (can never have too much rum, right? ;)) coconut macaroons, chocolate-peppermint biscotti, and many more.   The hostess always provides the recipes and I hope to share some of these in future too.


I really loved how these came out.  The polar bears are simple and cute but my favorites were these trees with snow...they just make me happy :)


Sugar Cookies

Ingredients:

3 cups all-purpose flour
1 teaspoon baking powder
1 cup (2 sticks) unsalted butter, room temperature
1 cup sugar
1 large egg
1 1/2 teaspoon good quality vanilla extract

Parchment paper or Silpat mat

Directions:

-In a medium bowl, stir together the flour and baking powder and set aside.
-In the bowl of an electric mixer, using the paddle attachment, cream together the butter and sugar until light and fluffy. This should take about 3 minutes.
-Add the egg and vanilla and beat another minute or so.
-Add the flour mixture slowly. (Be careful not to add too much at a time or you will have a snowstorm of flour.)
-Blend until all of the flour is incorporated and the dough begins to pull away from the sides of the bowl.
-Take the dough out of the bowl and place it on a piece of parchment paper. 
-Using your hands, knead the dough a few times.
-Place the dough in a large plastic (Ziploc type) bag and refrigerate for about 2 hours. If you want to speed up the chilling process, place the bag of dough in the freezer for about 20-30 minutes. Just don't forget it in the freezer, or it will become to firm to work with (and then you'll have to wait for it to thaw). 
-When it's almost time to remove the dough from the refrigerator (or freezer), preheat oven to 350 degrees (F).
-When the dough has chilled and is firm, take out about half of the dough, leaving the rest in the refrigerator (until your ready to work with it).

Royal Icing

Ingredients: 
4 Tablespoons Meringue Powder (I use Wilton Brand)
4 cups (about 1 pound) powdered sugar
6 Tablespoons warm water
1 teaspoon clear vanilla extract


Directions:
Beat all ingredients until stiff peaks form. 
*Make sure all bowls and utensils are totally grease-free or your icing will never reach proper consistency.
Spoon some of the thick white icing into individual bowls and add coloring.  Then divide each colored batch in half.  Carefully, add and stir warm water to the icing to get a think and a thin "flooding" consistency.  Decorate your cookies.  Cookies will need 12-24 hours to dry completely.

Source: Glorious Treats