Showing posts with label Grown Up Food. Show all posts

Thursday, September 15, 2011

Shrimp Avacado Tostada


Well, better late than never right?

Sorry, it has taken so long to get this recipe up. I did want to share it though, b/c if you love tex/mex, salsa, avocado and shrimp you will enjoy this dish.

Plus, it sure is pretty isn't it? I love the look of all the different layers.


The original calls for frying the tortilla but I made it healthier by baking. I also used frozen corn for ease and pico de gallo instead of red bell pepper. Feel free to change things up to your liking...you really can't go wrong here.

Ingredients:

4 whole Small Corn Tortillas
Olive oil cooking spray

2 whole Avocados, Peeled And Pitted
3 Tablespoons Chopped red onion, divided
1 whole Lime, Juiced
½ pounds Medium Sized Shrimp, Peeled And De-veined
1 teaspoon Cayenne
1 teaspoon Garlic Powder
1 cup Refried Beans
1/2 cup frozen corn
1 tomato, seeded and finely chopped
2 Tbsp + 1 tsp. grapeseed or canola oil
1/3 cup cilantro, chopped
1 teaspoon Salt
1 teaspoon Pepper

Directions:

Preheat oven to 400 degrees. Spray tortillas with olive oil cooking spray and place on a cookie sheet. Bake for 8-10 minutes until tortillas are crispy. Turn tortillas over half way through. Remove from oven and keep warm.

Prepare avocado mixture by placing avocado, 1 tablespoon of lime juice and a pinch of salt and mix together. Cover the avocado with plastic wrap to prevent it from browning,

Prepare the pico de gallo by combining the chopped tomatoes, onion, jalapeno, cilantro, a squeeze of lime juice and a pinch of salt. Stir to combine ingredients and set aside.

Prepare the refried beans according to can directions and keep warm.

In a medium size bowl, toss the shrimp with the cayenne and garlic powder as well as salt and pepper. Saute in a medium skillet over medium heat with 2 Tablespoons of the grapeseed or canola oil for 2-3 minutes on each side until shrimp are pink and cooked. Remove from pan and keep warm. Wipe pan down with a paper towel and a little more oil (1 tsp). Cook corn until slightly charred (3-4 minutes).

Spread the 1/4 cup of refried beans on top of each tortilla. Sprinkle on the charred corn. Spread a layer of the mashed avocado mixture on top. Top the mashed avocado with the pico de gallo. Finish with a few shrimp. Season with salt and pepper if needed and garnish with cilantro.

Source: Inspired by TastyKitchen

Wednesday, June 8, 2011

BBQ Chicken Pizza


Have you ever been to a California Pizza Kitchen and had their signature BBQ Chicken pizza? Isn't it the best?? So, when I found this recipe online I had to try it!

How yummy is this...grilled chicken, gooey cheese, red onion and sweet BBQ sauce on a PIZZA. This recipe is a great copycat version but feel free to swap out the Parmesan for smoked Gouda which is on the original.


This BBQ sauce was perfect for the pizza. It has just the right amount of sweetness. I don't buy BBQ sauce that often but I easily found this one at my local Super Target.


Above: homemade BBQ chicken pizza
Below: CPK's original BBQ chicken pizza


Ingredients:

1 batch of pizza dough (store bought or homemade)
1 cup grilled chicken strips, chopped
3/4 cup Sweet Baby Rays BBQ Sauce
1 cup mozzarella cheese, grated
1 cup Parmesan cheese, grated
1/4 cup red onion, sliced
2 tablespoons cilantro, chopped

Directions:

1. Place a pizza stone in the oven and turn on to 475 degrees.
2. Roll out your pizza dough onto a pizza peel.
3. Pour the Sweet Baby Ray's over the top of the crust.
4. Sprinkle half of the cheese over the top of the sauce.
5. Then the chicken...
6. Then the onions...
7. Then the rest of the mozzarella and all of the Parmesan cheese.
8. Dot the top with a little bit more of the Sweet Baby Ray's.
9. Bake at 450 for about 15 minutes, or until the cheese is bubbly and the underside of the crust is golden.
10. Sprinkle the cilantro over the top and enjoy.

Source: JamieCooksItUp

Friday, March 11, 2011

Baked Chicken with Mushroom Sauce


Earlier in the week, I really wanted to make baked chicken with some sort of a mushroom sauce. I started searching online but was dissapointed to find almost all the recipes started with a can of soup:( Now, I'm OK with using a can of soup from time to time but for this recipe I really thought I could do without.

So, since I couldn't find a recipe I liked, I just made my own. It turned out just as I had hoped. This dish was so warm and inviting. The mushroom sauce was creamy and a little tangy....so good over mashed potatoes. The chicken inself was tender and flavorful. YUM!


I think this dish is nice enough to serve to company and it comes together relativly quickly too. I served this with mashed potatoes and green beans but it would would also be perfect over egg noodles.

Ingredients:

4 boneless skinless chicken breast halves
salt
pepper
1 cup all-purpose flour
1/2 teaspoon paprika
1/2 teaspoon of garlic salt
2 tablespoons butter
1 tablespoon of olive oil

1 tablespoon butter
4 cups sliced fresh mushrooms
1 cup chicken broth
1/2 teaspoon salt
1/8 teaspoon pepper
1/2 cup sour cream
1 tablespoon of fresh lemon juice
1/4 teaspoon of lemon zest
2 tablespoons all-purpse butter
2 tablespoons fresh parsley, chopped

Directions:

Preheat oven to 375°. Lightly, spray a 11-in. x 7-in. baking dish with cooking spray, set aside.

Flatten each chicken breast half to 1/2-in. thickness. Season chicken with salt and pepper.
Place flour, paprika and garlic powder in a resealable plastic bag; add chicken, a few pieces at a time. Seal and shake to coat.

In a large pan over med-high heat, add the butter and olive oil. Once pan is very hot, add the chicken (make sure to shake off excess flour!) and brown for 2 minutes on each both side. Transfer to the baking dish.

In the same skillet, add the rest of the butter and saute mushrooms for about 3 minutes.

Meanwhile, in a seperate bowl combine the broth,sour cream, lemon juice, lemon zest, 2 Tbsp flour, salt and pepper, whisk to combine. Add the mixture to the saute pan with the mushrooms and stir to combine. Cook the mushroom mixture for 2-3 minutes or until the sauce thickens slightley.

Then add the mushroom mixture to the top of the chicken and bake, uncovered, at 375° for 20-30 minutes or until chicken is no longer pink. Serve with a little parsley and fresh cracked pepper on top.

Source: Chef Mommy Original

Sunday, February 6, 2011

Buffalo Wings


I know that this post is a little after the fact but I just have to share it. These are the ultimate, perfect Buffalo wings!! Even if your not going to be making these soon, bookmark this recipe because it is simple, authentic and makes unbelievably good wings!!

My son has recently become obsessed with Buffalo wings and when we got invited to my neighbor's annual Super Bowl party, I quickly volunteered to bring the wings.

I got the instructions and recipe for one of my favorite video food blogs, Food Wishes. Chef John is a genius!!


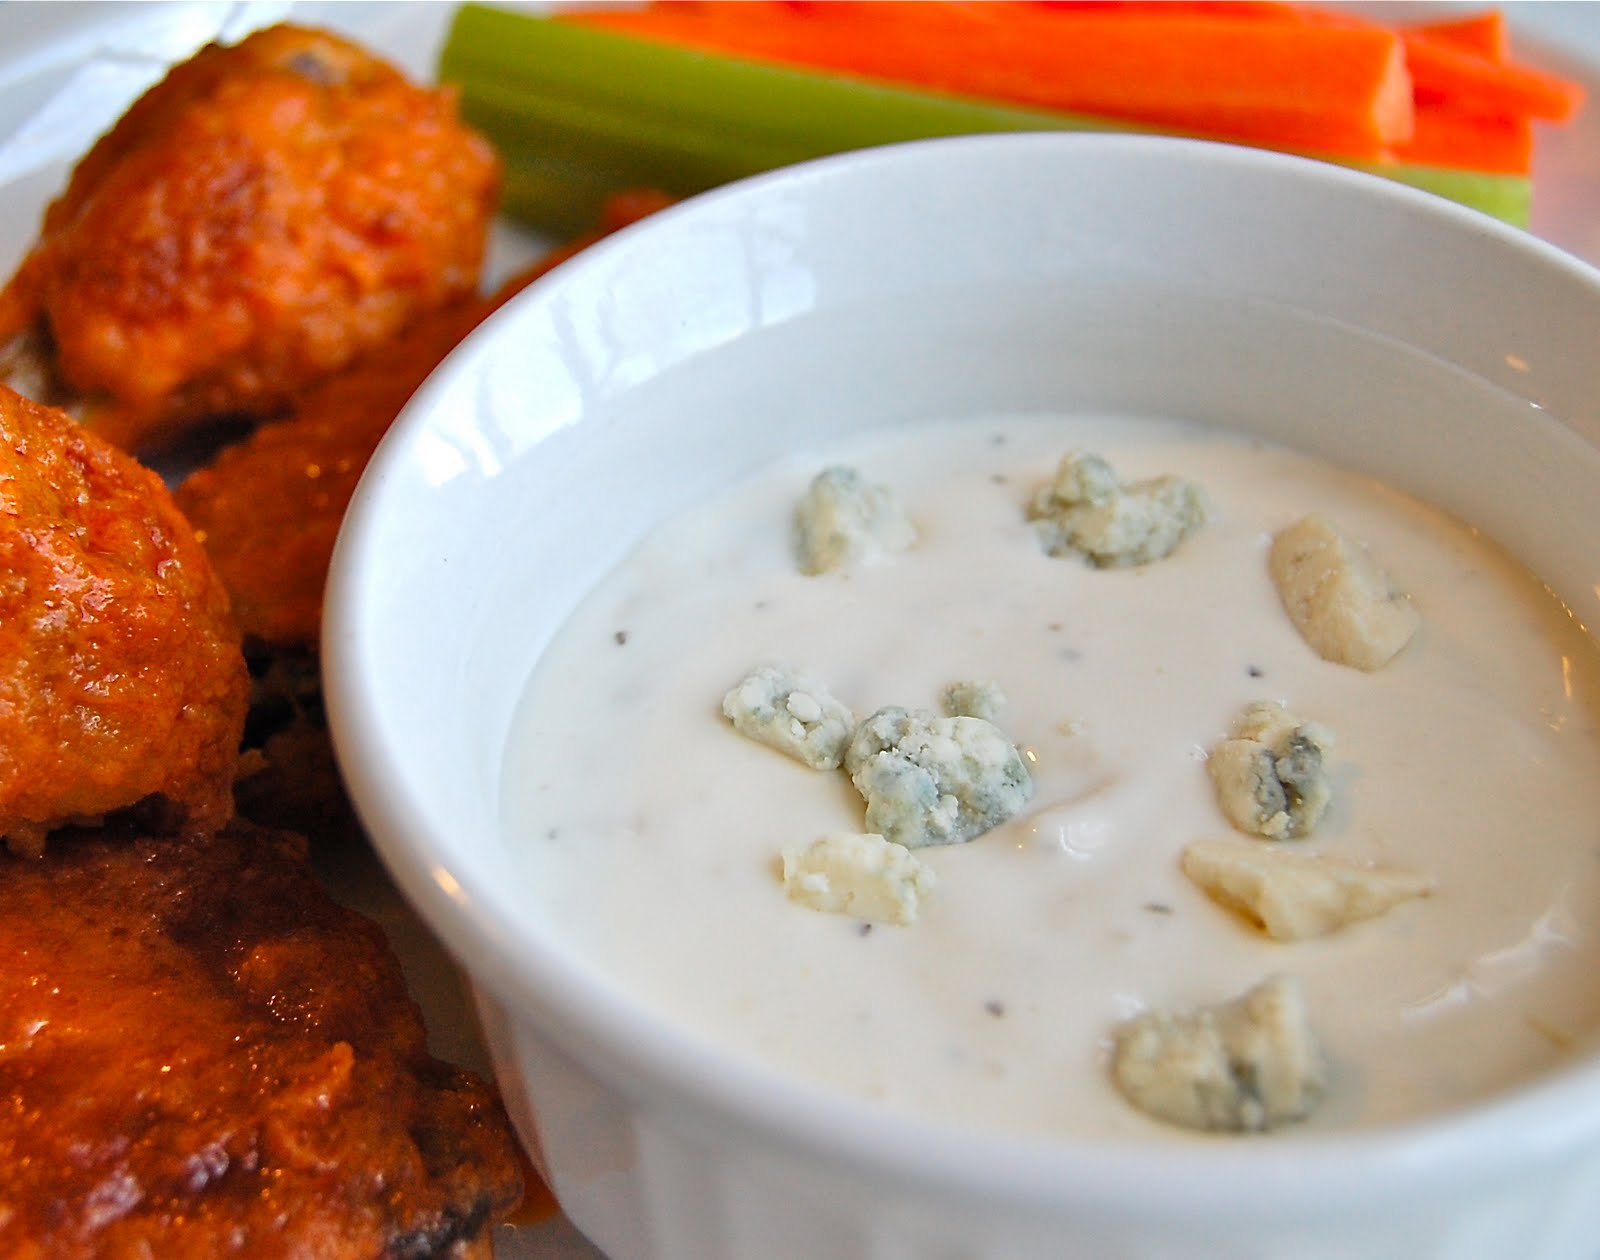
These wings are oven fried to perfection and then coated in an authentic Buffalo sauce recipe. I served these along with celery, carrot sticks and blue cheese dressing for dipping.

The blue cheese dressing was just a store bought bottled brand (Ken's to be exact) but I did sprinkle in a little bit of fresh blue cheese crumbles because....well, I love my blue cheese crumbly :)


I am not even going to post the recipe here because Chef John's videos are so well done and I think you really need to view them to make these correctly. The video was especially helpful in explaining how to cut apart the wing pieces. I would never have figured it out on my own.

So....
Click HERE for the basic chicken wing recipe and click HERE for the buffalo sauce recipe.

Source: Food Wishes

Monday, January 31, 2011

Shrimp Roll


Aren't we all looking for quick dinner ideas? This one goes from prep to table in less than 20 minutes! I served this with baked kettle chips, a dill pickle and dinner was done.


This is a great recipe if you are a shrimp lover. Not only is shrimp tasty but it is of course very low in fat and a snap to prepare. I always have a bag of frozen, uncooked shrimp in the freezer ready to go.


Ingredients:

1 lb uncooked frozen shrimp, thawed, cleaned and deviened
2-3 tablespoons olive oil
salt
pepper

1/4 cup mayonnaise
2 tablespoons fresh lemon juice
2 green onions, chopped
1 stalk celery, finely chopped
1 teaspoon fresh dill, finely chopped

4 hot dog buns or kaiser rolls, split (I used steak rolls)
1-2 tablespoons of butter, softened
4 Boston or bibb lettuce leaves

Directions:

Preheat the oven to 400 degrees.

In a medium bowl combine the mayo, lemon juice, celery and dill. Set aside.

Line a baking sheet with foil for easy clean up. Place the shrimp on the baking sheets and drizzle with olive oil (making sure all the shrimp are lightly coated). Sprinkle with salt and a small amount of pepper. Bake for 6 minutes. Remove from oven and let cool for 2-3 minutes.

Lightly butter the insides of the buns or rolls and toast them until golden brown. Then line with lettuce leaves. Set aside.

Add the shrimp to the mayo mix and gently fold until all of the shrimp are coated. Stuff the shrimp filling into the buns and serve immediately.

Source: Chef Mommy Original

Tuesday, January 11, 2011

Classic Chili (Slow Cooker)


I am so excited to share this recipe with you all, for several reasons. Here are 10:

1. It's perfect cold weather food.

2. It is made in a slow-cooker.

3. It's from Weight Watchers.

4. It's only 2 WW Points per serving on the old points system. Not sure how many on Points Plus but I bet it is still low. Visit the source of recipe for nutritional info. Click HERE.

5. It uses many pantry staple ingredients.

6. It makes great leftovers.

7. It's budget friendly.

8. Classic recipe and flavor the should appeal to all members of the family.

9. It's low in fat, high in fiber and gluten free!!

10. It tastes really, really great! Really!!

I love the color of the ground beef and peppers... just cooking away :)


I served this dish up with mini low-fat corn muffins. Total comfort food.


Ingredients:

1 lb extra lean ground beef or 1 lb ground turkey
1 tablespoon minced fresh garlic
1 large red bell pepper, seeded and diced
1 large green bell pepper, seeded and diced
2 tablespoons chili powder
2 teaspoons cumin
1 (28 ounce) can crushed tomatoes
1 (15 ounce) can red kidney beans (rinsed and drained)
1 sweet onion, chopped
1/4 cup canned diced chilies or 1 fresh jalapeno pepper, seeded and finely chopped
2 tablespoons tomato paste
1/2 cup-1 cup water (optional)
Sour Cream (optional)
Cilantro, chopped (optional)

Directions:

1. Cook the ground beef and garlic in a nonstick skillet breaking apart the meat with a spoon until well browned; drain off any fat very well, then return to skillet.
2. Add in the bell peppers; cook until softened (about 5 minutes).
3. Add in the chili powder and cumin and stir to coat.
4. In the slow cooker, mix together tomatoes, beans, sweet onion, chilies and tomato paste, then stir in the beef mixture.
5. Cover and cook on HIGH until flavors are blended (about 4-5 hours). If your chili looks too think at the end, feel free to add some water to thick it out a bit.
6. Serve with dollop of light sour cream and chopped fresh cilantro.

Source: adapted from Food.com

Wednesday, December 8, 2010

Surf n' Turf Sandwich


This sandwich was inspired by another favorite local restaurant. On the menu of the Union Street Pub in Old Town Alexandria, VA there is a "surf n' turf" sandwich that I am so crazy about. In fact, I probably order it about 90% of the time that we eat there.

Their sandwich featured thin slices of filet mignon, grilled shrimp, and crispy bacon on layers of toasty sandwich bread....it's so GOOD!! Since, I don't know the real recipe, I came up with my own version. It doesn't taste exactly like the one at Union Street Pub but it is pretty darn close and very tasty if I do say so myself.

So it all starts with spreading some homemade thousand island dressing on the toasted bread.


Then we start the layering. I used thin sliced roast beef from my grocery store deli instead of filet mignon here. This saved me some time and $$. The roast beef combined with the shrimp, bacon and dressing is just heavenly!


I think a little avocado would be very good here too. Unfortunately, my grocery store didn't have any that were ripe...oh well, next time!


OK, and now for some behind-the-scenes action...this is what happens while I try to photograph a dish, someone eats my props!

My little potato chip thief :)


Ingredients:

Thousand Island Dressing
1/2 cup mayonnaise (I used Hellman's reduced fat)
1/4 cup ketchup
1/4 cup sweet pickle relish
1 tsp fresh squeezed lemon juice (you will need the rest of the lemon later in the recipe)
1/2 tsp Worcestershire sauce
pinch of salt

Combine all ingredients in a bowl and mix well. Refrigerate until ready to assemble sandwich. The dressing is best made a few hours in advance or overnight.


Sandwich
Makes 4 Sandwiches

12 slices of country style or sourdough sandwich bread
12 thin slices of roast beef
12 slices of bacon
1 lb jumbo shrimp, deviened
Romaine lettuce, rinsed and torn
1 tsp. butter softened
2 tbsp canola oil
2 tbsp lemon juice
1/2 tsp lemon zest
1/4 tsp salt
1/8 tsp black pepper

Set a grill pan over high heat. Once the pan has heated up well, cook the bacon until crisp, turning as needed. Remove the bacon to a paper towel lined plate. Pour out the bacon drippings and wipe the grill pan with a paper towel, leaving only a small amount of bacon grease.

In a bowl combine the oil, lemon juice, zest, salt and pepper, wisk to combine. Add the shrimp and let marinate while the bread toasts.

Spread a very thin layer of butter on both sides of the bread. Add the bread to the grill pan and lower the heat to medium. Cook the bread until nice grill marks form. Remove from grill and continue with the rest of the bread.

Add the shrimp to the grill and cook until pink and opaque throughout. Remove from the pan and let cool slightly. Slice shrimp lengthwize.

Assemble the sandwich. Start by speading the dressing on one side of the bread, top with lettuce then 3 slices of roast beef. Spread dressing on both sides of the next slice of bread. Top with letuuce, shrimp, bacon and more lettuce. Spread dressing on one side of the last slice of bread and place on top top sandwich. Cut sandwiches in half and serve.

Source: Inspiered by Union Street Pub, Alexandria, VA. Recipe Chef Mommy Original.

Friday, December 3, 2010

Review of Hearst Ranch Beef and Kiwi Steak Marinade


I love a good steak...med-rare, flavorful and juicy. So couldn't wait to try the two complimentary grass-fed flank steaks sent to me by Hearst Ranch.

You might not have heard of Hearst Ranch before (I hadn't) but this place seems amazing. It was founded in 1865 (by William Randolf Hearst) in San Simeon, California and is today an 80,000-acre ranch raising free-range cattle that live a natural roaming existence, feeding only on native grasses.


This all-natural, grass-fed beef is exceptionally lean and juicy with a robust flavor resulting from the unique concentration of nutrients in the cows' grass diet. The taste was distinctly different from what I was used to but I thought it tasted delicious and liked complex "beefy" flavor.

Now on to the marinade...

I typically cook ribeye steaks and filet mignon at home. For those cuts, I do not do any sort of marinade. Just a bit of fresh crack black pepper, salt and we are good to go. However, flank steak is a tougher cut of meat and for that reason it really needs to sit in a good marinade for a few hours.


My friend Dave had shared this recipe a while back but I'll admit that when I saw the secret ingredient was kiwi I was a bit unsure. Dave explained that the kiwi has a powerful enzyme called actinidin that breaks down protein and essentially tenderizes the meat. Sure enough, it produced a delicious and tender steak.

This was such a flavorful meal. I topped off the steaks with a classic chimichurri sauce, pico de gallo and fresh avocado. I kept the side dish simple....rice and black beans.


Ingredients:
1-2lb flank steak

Marinade:
juice of 1 lime
1/4 C olive oil
1/4 C minced cilantro
1-2 Serrano chillies minced (to taste), I only used 1/2 of one
1 Tbs minced garlic
1 tsp sugar
1/2 tsp ground coriander seed
1/2 tsp Mexican oregano
1/4 tsp ground cumin seed
1 1/2 tsp kosher salt (less if using table salt)
black pepper to taste
1 Tbs pureed kiwi

Directions:

Combine all the marinade ingredients in a container with a lid that will fit the meat. Taste the marinade and add more salt or sugar if needed. It should be relatively salty, but not so salty that it burns your tongue. The sugar is a personal preference thing. If you like it sweeter, add more sugar. Add the flank steak to the marinade and refrigerate for 4-6 hours.

When you’re ready to grill the meat, remove it from the refrigerator about 30 minutes before cooking to allow it to come to room temperature. This helps ensure the meat will cook evenly. If you’re using a broiler, move the rack to the top position and turn the broiler on high, with a grilling rack on top of a baking sheet. Scrape any excess marinade off the meat and place the meat on the grill. Cook until nicely browned on one side, flip and brown the other side. *Please note that grass-fed steak will cook much faster than regular flank steak, so be careful not to overcook it.*

Transfer the steak to a cutting board and let it rest for at least 5 minutes. Use a sharp knife slice against the grain and serve.

Source: Courtesy of David Mankin

Thursday, September 9, 2010

Ina's Mac and Cheese


This week my kids went back to school-----YAY!!! A lot of my friends expressed feeling sad and even shed a few tears but for me, I was just happy and excited for all of us. After a long and somewhat stressful summer, I couldn't wait for the routine of school to start again. It's a big year too.... my son started kindergarten and daughter started preschool.

We like to celebrate the first day of school, so I let my son pick dinner Tuesday night (his first day) and I made cupcakes for Thursday night (my daughter's first day).

Here he is with the school mascot...Go Mighty Mustangs!!! -LOL

My son wanted mac and cheese...no big surprise :) Not only does he love it but he also wanted a soft food because he has a very loose tooth (his first). I decided on this classic recipe from Ina Graten that I bookmarked and had wanted to try for a while.

Now, I love Ina but I was a bit disappointed with this recipe. The nutmeg and pepper flavors were just too strong for me. I also thought the addition of Gruyere cheese mellowed out the sharp cheddar flavor a little too much. Let it be noted though that this "grown-up" tasting dish was loved by both my kids. This recipe also gets rave reviews on the Food Network site, so you might want to give it a try too.


Ingredients:

Kosher salt
Vegetable oil
1 pound elbow macaroni or cavatappi
1 quart milk
8 tablespoons (1 stick) unsalted butter, divided
1/2 cup all-purpose flour
12 ounces Gruyere, grated (4 cups)
8 ounces extra-sharp Cheddar, grated (2 cups)
1/2 teaspoon freshly ground black pepper
1/2 teaspoon ground nutmeg
3/4 pound fresh tomatoes (4 small) I didn't have any on hand.
1 1/2 cups fresh white bread crumbs (5 slices, crusts removed)

Directions:

Preheat the oven to 375 degrees F.

Drizzle oil into a large pot of boiling salted water. Add the macaroni and cook according to the directions on the package, 6 to 8 minutes. Drain well.

Meanwhile, heat the milk in a small saucepan, but don't boil it. Melt 6 tablespoons of butter in a large (4-quart) pot and add the flour. Cook over low heat for 2 minutes, stirring with a whisk. While whisking, add the hot milk and cook for a minute or two more, until thickened and smooth. Off the heat, add the Gruyere, Cheddar, 1 tablespoon salt, pepper, and nutmeg. Add the cooked macaroni and stir well. Pour into a 3-quart baking dish.

Slice the tomatoes and arrange on top. Melt the remaining 2 tablespoons of butter, combine them with the fresh bread crumbs, and sprinkle on the top. Bake for 30 to 35 minutes, or until the sauce is bubbly and the macaroni is browned on the top.

Source: Ina Graten

Wednesday, June 30, 2010

Pizza Margherita


Pizza, pizza, pizza...who doesn't love it, right? I know we sure do. It's probably the number one food enjoyed in my house. Like many American families we have pizza almost every week. So, I try to mix things up by making different types. This time of year, pizza margherita is in heavy rotation around here since we always have an abundance of fresh tomatoes and basil. If there is such a thing a summertime pizza, this is it!

Just a thin coating of the tomato sauce...too much here makes for a messy pizza.


Add the cheese and tomatoes on top. My husband actually prefers this without the fresh tomato slices, so feel free to omit.


Fresh out of the oven...how good does that look?


Mmmmmmmm....pizza!


Ingredients:

1 batch of your favorite pizza dough

1 14-ounce can peeled whole San Marzano (such as Cento or Muri Glen) tomatoes, drained
1/2 teaspoon dried or fresh oregano, crumbled
1/4 teaspoon of sugar
2 tablespoon extra-virgin olive oil
Coarse sea salt and freshly ground pepper
8 - 10oz fresh mozzarella, thinly sliced
1 tomato, sliced (optional)
large basil leaves, torn into pieces

Directions:

Set a pizza stone in the oven and preheat the oven to 500°, allowing at least 30 minutes for the stone to heat. Pulse the canned tomatoes in a food processor until coarsely chopped. Stir in the oregano and 1 tablespoon of the olive oil, sugar and season with salt and pepper.
On a lightly floured surface, stretch out ball of dough and transfer to a floured pizza peel, adding flour where the dough sticks. Brush olive oil all around the edge of the dough.

Spread the tomato sauce over the dough to within 1 inch of the edge. Lay the cheese slices over the pizza and drizzle with 1 tablespoon of oil. Add the fresh tomato slices on top of the cheese and slide the pizza onto the stone. Bake until the cheese is melted, about 8-10 minutes. Scatter the basil on top and let stand for 3 minutes before serving.

Source: adapted from Food and Wine

Monday, April 26, 2010

Spinach Lasagna Rolls


I love lasagna...but it always takes so long to make. After boiling the noodles, browning the meat, simmering the sauce, mixing up the cheeses, assembling it all, then baking, you are looking at about 2 hours of work. I don't know anyone who has that much time during the week to make dinner (I certainly don't). That is why these lasagna rolls from Gina appealed to me so much. After quickly glancing through the list of ingredients and directions, I knew this was very doable for a weekday dinner.

What I didn't expect was for these rolls to taste as good as they did. This recipe consists of just a few simple ingredients and I was afraid it would taste a little bland. However, this was not the case at all. It was really tasty, not to mention healthy (hello spinach!). Plus, since they are rolls, you have built in portion control and who doesn't love that?

Right out of the oven, all hot and gooey!


All you need is a simple side salad and you are good to go.


Ingredients:
9 lasagna noodles, cooked (I only made/used 6)
10 oz frozen chopped spinach, thawed and completely drained
15 oz fat free ricotta cheese (I like Polly-o)
1/2 cup grated Parmesan cheese
1 egg
salt and fresh pepper
32 oz tomato sauce
9 tbsp (about 3 oz) part skim mozzarella cheese, shredded

Preheat oven to 350°. Combine spinach, ricotta, Parmesan, egg, salt and pepper in a medium bowl. Ladle about 1 cup sauce on the bottom of a 9 x 12 baking dish.

Place a piece of wax paper on the counter and lay out lasagna noodles. Make sure noodles are dry. Take 1/3 cup of ricotta mixture and spread evenly over noodle. Roll carefully and place seam side down onto the baking dish. Repeat with remaining noodles.

Ladle sauce over the noodles in the baking dish and top each one with 1 tbsp mozzarella cheese. Put foil over baking dish and bake for 40 minutes, or until cheese melts. Makes 9 rolls.

To serve, ladle a little sauce on the plate and top with lasagna roll.

WW POINTS: 4 (1 roll)

Source: Gina's Weight Watcher Recipes

Wednesday, April 7, 2010

Chicken Francese


Chicken Francese...it's one of those dishes that you always see on a wedding menu or just about any other catered event. However, it's something that I rarely make at home...until this week. For some reason, I was totally craving chicken francese!

When I found this version by Tyler Florence, I thought "perfect!". It was exactly what I was looking for. Simple ingredients and it had a five start rating, so I knew this would be good...and it was.

The chicken was moist and the sauce flavorful with out being too lemony (though I like lemon, so a little more wouldn't have bothered me). The one thing I would change next time is to add a bit more flour (maybe 1 tbsp.) because the sauce was a bit thin. Overall, this is a great recipe for this classic dish.

Here it is....almost ready...just simmering away...


Dinner Time! I served this up with a simple thin spaghetti (tossed with a little olive oil and fresh parsley) and a salad.


Ingredients
4 skinless, boneless, chicken breasts (about 11/2 pounds)
All-purpose flour, for dredging
Kosher salt and freshly ground black pepper
4 large eggs
3 tablespoons water
1/4 cup extra-virgin olive oil
1/2 lemon, with rind, cut in thin rounds
1/2 cup dry white wine, such as Pinot Grigio
1 cup chicken broth
1/2 lemon, juiced
2 tablespoons unsalted butter
1/4 cup chopped flat-leaf parsley

Directions
Put the chicken breasts side by side on a cutting board and lay a piece of plastic wrap over them. Pound the chicken breasts with a flat meat mallet, until they are about 1/4-inch thick. Put some flour in a shallow platter and season with a fair amount of salt and pepper; mix with a fork to distribute evenly. In a wide bowl, beat the eggs with 3 tablespoons of water to make an egg wash. Heat the oil over medium-high flame in a large skillet.

Dredge both sides of the chicken cutlets in the seasoned flour, and then dip them in the egg wash to coat completely, letting the excess drip off. When the oil is nice and hot, add the cutlets and fry for 2 minutes on each side until golden, turning once. Remove the chicken cutlets to a large platter in a single layer to keep warm.

Toss the lemon slices into the pan and cook for 1 to 2 minutes, until fragrant. Add the wine, broth, and lemon juice, simmer for 5 minutes to reduce the sauce slightly. Roll the butter in some flour and add it to the skillet, this will thicken the sauce. Stir to incorporate and dissolve the flour. Reduce the heat to medium-low and return the chicken to the pan; place the lemon slices on top of the cutlets. Simmer gently for 2 minutes to heat the chicken through. Season with salt and pepper and garnish with chopped parsley before serving.

Source: Tyler Florence

Friday, January 1, 2010

Chocolate Mousse


Here is a classic chocolate mousse that is sure to impress guests. It's perfectly rich and chocolaty...a decadent dessert. This recipe is pretty simple but be sure to follow the directions carefully to insure best results. I made these for my husband and I to enjoy last night, while we waited for the ball to drop and the new year to start.

The mousse in a champagne glass.


We decided to go out to a "fancy" dinner to celebrate the New Year last night. However, we came up with the idea very last minute and almost every restaurant we called was booked already. We did manage to get an early table at Ruth's Chris steakhouse though, which worked out well. It was "fancy" but still appropriate for us to bring the kids. I think they both enjoyed getting dressed up (my son liked it b/c he got to look like daddy) and both ate very well. We split a petite fillet, grilled shrimp, broccoli gratin and a very rich chocolate dessert with them.

All dressed up and somewhere to go.


I will be back on Monday with some healthy meal ideas, till then HAPPY NEW YEAR!

Ingredients
8 (1 ounce) squares semisweet chocolate, coarsely chopped
1/2 cup water, divided
2 tablespoons butter, divided
3 egg yolks
2 tablespoons sugar
1 1/2 cups whipping cream

Begin by chilling the a bowl and whisk beaters in the freezer. Then in a double boiler, heat chocolate, 1/4 cup water and butter until the chocolate and butter are melted. Cool for 10 minutes. Make the whip cream in the meantime by adding the whipping cream and 1 Tbsp. of sugar to the chilled bowl. Stir till stiff peaks appear. Reserve 3/4 cups of whipped cream to garnish on top.

Then, in a small heavy saucepan, whisk egg yolks, sugar and remaining water. Cook and stir over low heat until mixture reaches 160 degrees F, about 1-2 minutes. Remove from the heat; whisk in chocolate mixture. Set saucepan in ice and stir until cooled, about 5-10 minutes. Fold in whipped cream. Spoon into dessert dishes. Refrigerate for 4 hours or overnight. Garnish with additional whipped cream and chocolate shavings.

Source: Adapted from Allrecipes.com

Tuesday, December 29, 2009

Holiday Carrot Cake


I made this carrot cake for Christmas and it was a big hit! In fact, my brother admitted to eating a slice for breakfast the day after...LOL. The addition of the cranberries, which are in the batter and on top as a garnish, makes it just a little more special and totally appropriate for the holiday season. However, you can completely omit the cranberries and simply enjoy this classic carrot cake with a rich cream cheese frosting any time of the year.

In addition to this cake, I did a TON more cooking for Christmas. I also made broiled salmon, beef tenderloin, fresh baked rolls,herbed butter,baked rice pilaf, roasted potatoes,green beans, salad and 4 different appetizers...and I cooked it all by myself...phew :) It was a lot of work, but totally worth it.

I hope you all had a nice holiday too.

Ingredients
Cake:
2-1/2 cups all-purpose flour
1 teaspoon baking soda
1 teaspoon baking powder
1-1/2 teaspoons pumpkin pie spice
1/2 teaspoon salt
1 cup granulated sugar
3/4 cup packed light-brown sugar
1-1/2 cups vegetable oil
4 eggs
2 teaspoons vanilla extract
3 medium-size carrots, peeled and shredded (about 2 cups)
3/4 cup walnuts, chopped
1/2 cup sweetened dried cranberries

Frosting:
2 packages (8 ounces each) cream cheese, at room temperature
1/2 cup (1 stick) unsalted butter, softened
1 teaspoon vanilla extract
3 cups confectioners' sugar
cranberries and walnuts, for garnish

1. Heat oven to 350 degrees F. Coat two 9 x 2-inch round cake pans with cooking spray. Line bottoms with waxed paper. Coat paper with spray.
2. Cake: In medium-size bowl, whisk flour, baking soda, baking powder, pumpkin pie spice and salt. In large bowl, beat sugars, oil, eggs and vanilla on medium speed until blended. On low, beat in flour mixture until smooth. Stir in carrots, nuts and cranberries. Divide batter between pans, spreading evenly.
3. Bake at 350 degrees for 42 to 44 minutes or until toothpick inserted in center comes out clean. Cool on wire rack 10 minutes. Turn out and cool completely.
4. Frosting: In large bowl, beat cream cheese, butter and vanilla until creamy. Gradually beat in confectioners sugar until smooth.
5. With serrated knife, cut each cake horizontally in half. Place one layer on cake plate and spread with 1 cup frosting. Repeat two more times with layers and frosting. Place remaining layer, cut-side down, on top and spread with remaining frosting. Garnish with berries and nuts. Makes 16 servings.

Source: Family Cirlce Magazine Dec 2009

Tuesday, November 10, 2009

Mini Cheesecakes


My husband and I are big fans of the AMC series Mad Men. Last Sunday was the season finale and I wanted to make a special dish to enjoy while we watched the show.

I found this perfect 60's inspired menu on the blog, EzraPoundCake. All of the food looked so fab but we already had plans to go over some friend's that night for dinner. So, I decided to only make dessert and am really glad I did!

I made Peggy's New York style mini cheesecakes and used the Kraft foods recipe the blog links to. I loved the fact that they were "mini" (built-in portion control, right?) and they tasted so rich and creamy--yum,yum!!

Ingredients:
1 cup HONEY MAID Graham Cracker Crumbs
3 Tbsp. sugar
3 Tbsp. butter or margarine, melted
3 pkg. (8 oz. each) PHILADELPHIA Cream Cheese, softened
3/4 cup sugar
1 tsp. vanilla
3 eggs

PREHEAT oven to 300°F. Mix cracker crumbs, 3 Tbsp. sugar and the butter; press scant 1/3 cup crumb mixture onto bottom of each of four mini (4-1/2-inch) springform pans. (I found mine at Michaels's) Bake 7 min.

BEAT cream cheese, 3/4 cup sugar and the vanilla with electric mixer on medium speed until well blended. Add eggs, one at a time, mixing on low speed after each addition just until blended. Pour one-fourth of the batter (about 1 cup) into each of four bowls. If desired, add one of the Stir-In Ideas to each bowl of batter. Pour over crusts. Place pans on baking sheet.

BAKE 40 to 45 min. or until centers are almost set. Run knife or metal spatula around rims of pans to loosen cakes; cool before removing rims. Refrigerate at least 4 hours.

Stir-In Ideas
For each one-fourth portion of batter, stir in one of the following before pouring batter over crust and baking as directed:
Apple Pie: Stir in 1/8 tsp. ground cinnamon. Top baked cheesecake with combined 1/2 cup warmed apple pie filling and 1/2 tsp. brown sugar. S'Mores: Stir in 3 Tbsp. milk chocolate chips. Top baked cheesecake with 1/4 cup JET-PUFFED Miniature Marshmallows and 1 Tbsp. broken HONEY MAID Honey Grahams. Citrus: Stir in 1 tsp. lemon, orange or lime juice; 1 tsp. flour and 1/4 tsp. grated lemon, orange or lime peel. Chocolate Chunk: Stir in 1 square BAKER'S Semi-Sweet Baking Chocolate, chopped. New York: Stir in 1/4 cup BREAKSTONE'S or KNUDSEN Sour Cream and 1 Tbsp. flour. Cookies and Cream: Stir in 1/4 cup chopped OREO Cookies. Chocolate Royale: Stir in 2 squares BAKER'S Semi-Sweet Baking Chocolate, melted. Peanut Butter: Stir in 2 Tbsp. peanut butter and 1 Tbsp. milk. Mocha: Mix 1 tsp. MAXWELL HOUSE Instant Coffee granules with 2 tsp. hot water. Stir into batter along with 2 squares BAKER'S Semi-Sweet Baking Chocolate, melted. Cherry: Bake mini cheesecake as directed without Stir-Ins. Just before serving, top with 1/3 cup cherry pie filling.

Tuesday, November 3, 2009

Garlic Shrimp Bruschetta


I found the recipe in Woman's Day and couldn't wait to try it.

It's easy to make, tastes delish and looks elegant. It's perfect for the upcoming holidays. The best part is that you can prepare the toasted bread and the tomato mixture 2 hours before serving.

Ingredients:
Makes 24

24 thin slices French bread
Olive oil cooking spray
1 cup diced plum tomatoes
1 Tbsp olive oil
3⁄4 tsp minced garlic
1⁄4 tsp each salt and pepper
24 medium shrimp
1⁄4 cup pesto
Garnish: small basil leaves (I didn't have any on hand :( )

Heat broiler. Place bread on baking sheet; coat with cooking spray. Broil 2 to 3 minutes, turning once, until lightly toasted.
Put tomatoes, 1 tsp of the oil, 1⁄2 tsp of the garlic, and the salt and pepper in a bowl. Toss to coat. Heat remaining 2 tsp oil in a large nonstick skillet. Add shrimp and remaining 1⁄4 tsp garlic. Saute 2 minutes or just until shrimp are cooked through. Remove from heat. To assemble, spread each piece of toasted bread with 1⁄2 tsp pesto. Top with about 1⁄2 Tbsp tomato mixture, then one shrimp.

WW POINTS = 1 (for 1 prepared bruschetta slice)

Saturday, September 12, 2009

Stuffed Baked Potatoes (two ways!)


Sometimes it can be a real challenge cooking for my husband and young children. They all seem to like such different things.

My husband prefers meals that require minimal clean up and are low-fat. My son eats a good variety of food but like many young kids dislikes most vegetables. My daughter is only 1.5 years old and is my pickiest eater. She loves cheese and pasta but not much else. Plus, b/c of her young age she can't eat certain things, such as nuts or shellfish. So,that's why I like meals like these stuffed potatoes. I can customize each potato, so everyone eats what they like but I'm not doing a lot of extra work.

For my husband and I, we got a more grown up taste with the addition of the andouille sausage. I still had some leftover from the Jambalaya and got the idea to use it from Emeril's recipe. For the kids, I kept it simple with just broccoli and cheese. Pair this with a salad and you have a complete meal.


Before baking.


On the left-- Potato with andouille sausage, broccoli and cheese.
On the right-- Potato with just broccoli and cheese.


Here is the basic recipe with just broccoli and cheese. I put the steps for the addition of sausage (and parsley) with an asterisk.

Ingredients
Makes 4 servings

4 large baking potatoes
1/2- 1 Tbsp. olive oil
2.5 cups broccoli florets
1/2 onion, finely chopped
4 cloves garlic, minced
1 cup grated white cheddar cheese
1/4 cup sour cream
2 Tbsp. milk
Salt and pepper

*6 oz andouille sausage (about 2 links, casings removed and crumbled)
*2 Tbsp fresh chopped parsley

Preheat oven to 375°F. Pierce potato with a fork several times. Bake until tender, 1 hour and 30 minutes. Or, you can cook in the microwave for 7-8 minutes. Steam broccoli until tender, 5 minutes. Drain; rinse. Pat dry and roughly chop.

*In a skillet over med heat add 1/2 tbsp. oil and cook sausage for 8-10 min or until thoroughly cooked. Remove from pan and drain on paper towels.

In a skillet over med heat, warm 1/2 Tbsp. oil. Saute onion until soft, 8 minutes. Add garlic; cook 2 minutes. Remove from heat.

Let potatoes rest until cool enough to handle. Set oven to 350°F. Cut top 1/4 inch off potato. Scoop out flesh.

Mash potato flesh. Mix with remaining ingredients. Fill potato shells with mixture; bake for 10-15 minutes. Then put under broiler for about 5 min or until top is golden.

*Add sausage and the parsley to the mix.