Showing posts with label Video. Show all posts

Monday, August 16, 2010

S'mores cupcakes


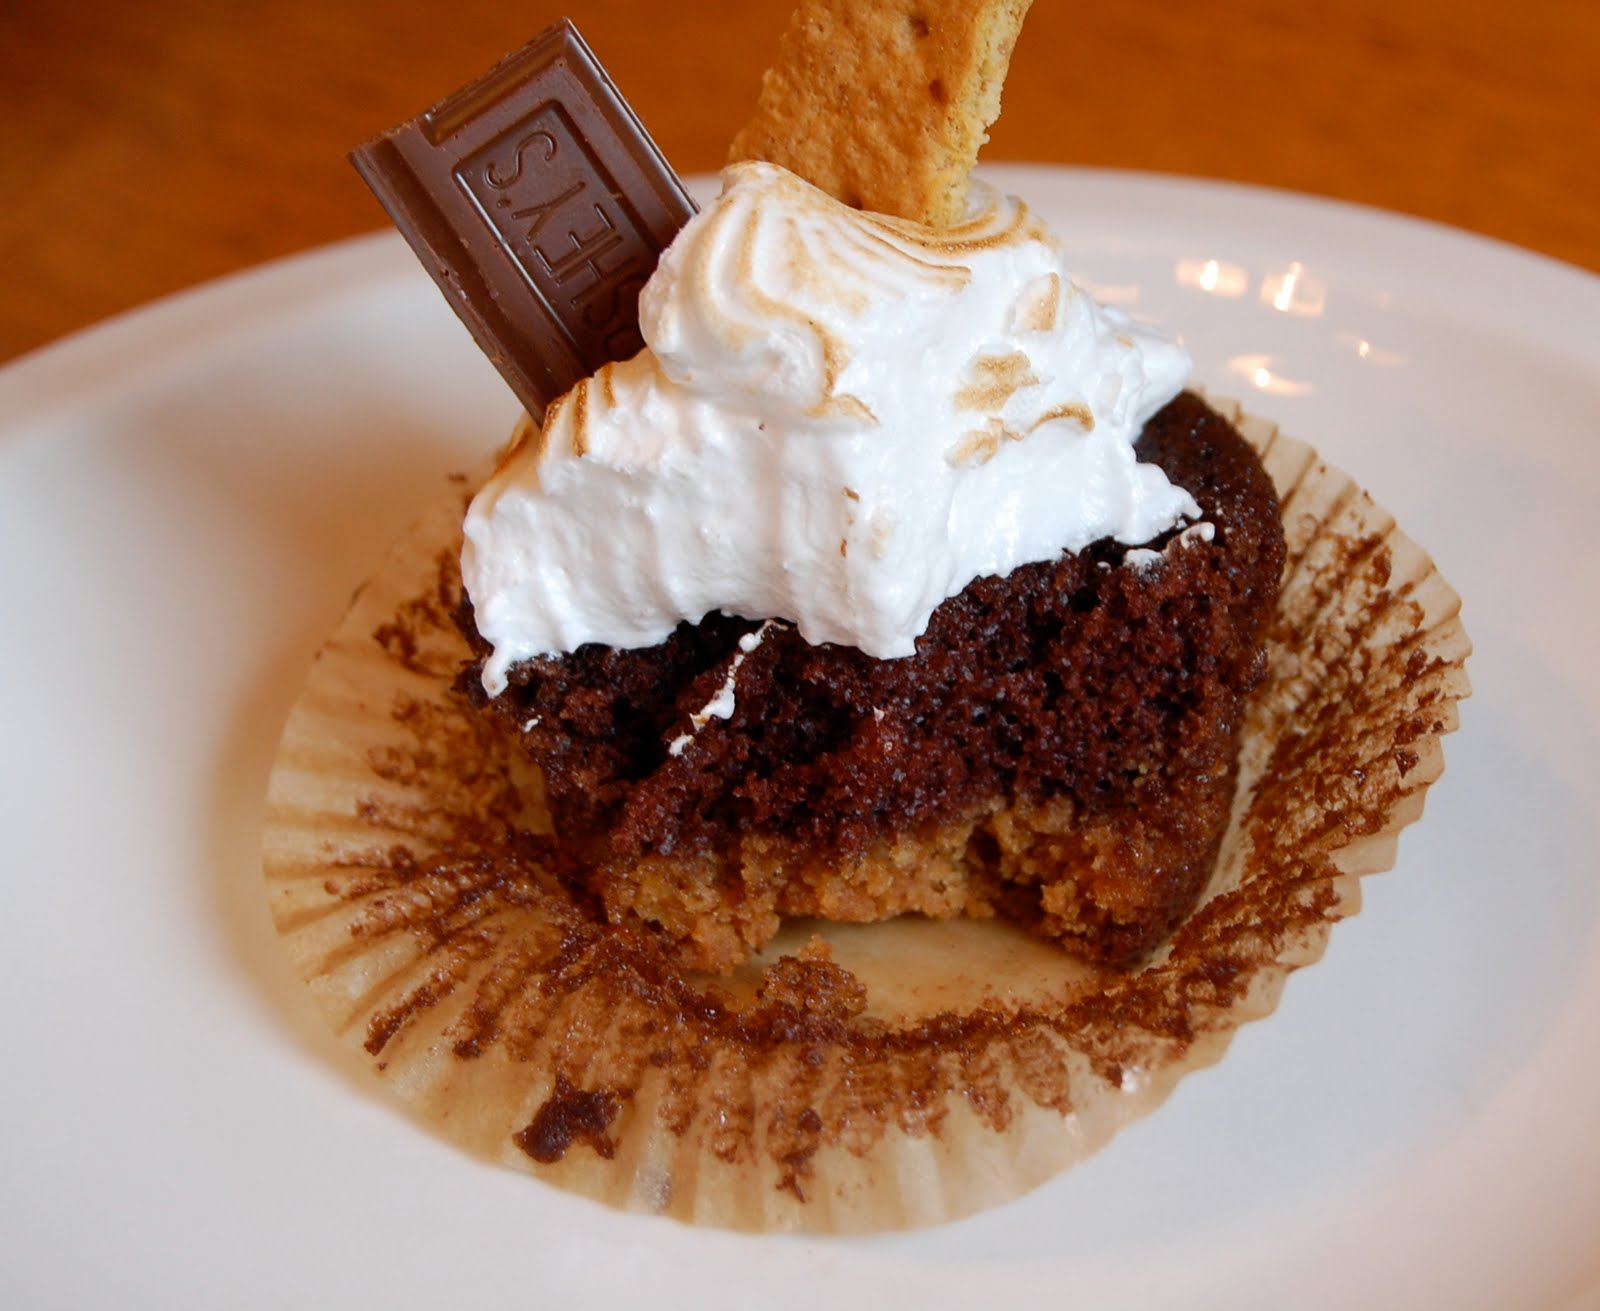
This past weekend we visited some friends and I brought these for dessert. Boy oh boy...were they good and received rave reviews from everyone!

These cupcakes really have it all. They start with a graham cracker crust on the bottom. Then a wonderful chocolate cake (Hershey's "perfectly chocolate" recipe) and are topped off with a homemade marshmallow meringue frosting. They taste rich, chocolaty...just like a s'mores, only no campfire required :)


I used my creme brulee torch to toast the tops. This part was a lot of fun. Then topped off each with a piece of chocolate and graham cracker. These really made an impressive presentation and looked like they came from a fancy cupcakery not my kitchen.


Look at that graham cracker crust....everyone loved it! I didn't add the bittersweet chocolate to the top of the graham cracker but the recipe was still fantastic with out it. The only change I will make next time is to only make half of the frosting recipe. The full recipe is listed below but it makes a TON of marshmallow meringue!

Click HERE to see the owner of Trophy bakery make these cupcakes on the Martha Stewart show.

Ingredients:

For the graham cracker crust:
1½ cups graham cracker crumbs
¼ cup sugar
5 1/3 tbsp. unsalted butter, melted
8 oz. bittersweet chocolate, finely chopped (I didn't have any, so omitted)

For the cake:
2 cups plus 2 tbsp. sugar
1¾ cups all-purpose flour
¾ cup plus 1 tbsp. cocoa powder
1½ tsp. baking powder
1½ tsp. baking soda
1 tsp. salt
2 large eggs
1 cup whole milk
½ cup vegetable oil
2 tsp. vanilla extract
1 cup boiling water

For the frosting: (I will half this recipe next time)
8 large egg whites, at room temperature
2 cups sugar
½ tsp. cream of tartar
2 tsp. vanilla extract

Directions:
Preheat the oven to 350° F. Line two cupcake pans with paper liners. In a small mixing bowl, combine the graham cracker crumbs, sugar and melted butter; mix well with a fork. Drop about 1 tablespoon of the graham cracker mixture in the bottom of each cupcake liner and press down with the back of a small cup to line the bottom. Sprinkle a small amount of the chopped chocolate on top of the graham cracker crusts (if using, I skipped this). Bake for 5 minutes. Remove from the oven, and maintain the oven temperature.

To make the cake batter, sift together the sugar, flour, cocoa powder, baking powder, baking soda and salt in the bowl of an electric mixer fitted with the paddle attachment; mix on low speed just to combine. In a mixing bowl, combine the eggs, milk, vegetable oil and vanilla extract; whisk together. Add to the dry ingredients and mix on low speed for 30 seconds. Scrape down the sides of the bowl, then beat on medium speed for 2 minutes. Add the boiling water and stir just to combine (batter will be very thin).

Divide the batter evenly between the prepared cupcake liners, filling each about ¾ of the way full. Return the pans to the oven and bake about 18-20 minutes, until a toothpick inserted in the center comes out clean, rotating the pans halfway through baking. Allow to cool in the pans 5-10 minutes, then remove and transfer to a wire rack to cool completely.

To make the frosting, combine the egg whites, sugar and cream of tartar in the top of a double boiler. Heat the mixture, whisking frequently, until it reaches 155° F with an instant-read thermometer. Transfer the mixture to the bowl of an electric mixer fitted with the whisk attachment. Whisk starting at low speed and gradually increasing to medium-high speed until stiff, glossy peaks form. Mix in the vanilla until combined. Frost cooled cupcakes as desired. Brown with a kitchen torch and garnish with chocolate and graham cracker pieces.

Source: Martha Stewart

Thursday, October 22, 2009

Chicken Parmesan (Giada's recipe)


I love one pot (or pan in this case)dishes! Less stuff to clean up afterwards is always a very good thing. The other great thing about this classic from Giada,is that it tastes a little lighter than traditional chicken Parmesan recipes that are dipped in egg and breaded.

This dish works well for a weeknight meal. Just be sure to check that your cookware is safe for high oven temps. I use Calphalon Tri-ply stainless steel, which are oven safe up to 500 degrees. If your cookware isn't rate for high oven temps, you can always transfer the chicken to a baking dish after cooking it on the skillet.

Click HERE to see video of this dish.

Ingredients

3 tablespoons olive oil
1 teaspoon chopped fresh rosemary leaves
1 teaspoon chopped fresh thyme leaves
1 teaspoon chopped fresh Italian parsley leaves
Salt and freshly ground black pepper
8 (3-ounces each) chicken cutlets
1 1/2 cups tomato sauce,homemade or purchased marinara sauce
1/2 cup shredded mozzarella
16 teaspoons grated Parmesan
2 tablespoons unsalted butter, cut into pieces

Preheat the oven to 500 degrees F.

Stir the oil and herbs in a small bowl to blend. Season with salt and pepper. Brush both sides of the cutlets with the herb oil. Heat a heavy large oven-proof skillet over high heat. Add the cutlets and cook just until brown, about 2 minutes per side. Remove the skillet from the heat.

Spoon the marinara sauce over and around the cutlets. Sprinkle 1 teaspoon of mozzarella over each cutlet, then sprinkle 2 teaspoons of Parmesan over each. Sprinkle the butter pieces atop the cutlets. Bake until the cheese melts and the chicken is cooked through, about 3 to 5 minutes.

Wednesday, October 7, 2009

Baked Mac and 4 Cheeses


You know what?...I really stink at meal planning sometimes. Every Sunday morning, I plan my meals for the entire week. Then later in the day I go to the grocery store for one big food run. However, many times after a day or two of pre-planned meals, I get cravings for something completely different. That's how this mac and cheese dish came about.

Today, I got a craving for mac and cheese. So I started browsing through FoodNetwork.com and found this one by Ellie Krieger. What really appealed to me about her recipe is that she started off the cheese sauce with pureed squash! Sneaking in the veggies...yeah, I'm all about that!

Now, I will admit that this is not my favorite mac and cheese recipe. It tasted a little bland to me. Maybe it's b/c I only used sharp cheddar instead of extra-sharp or the ricotta somehow muted some of the other flavors...I don't really know. However, BOTH of my kids really liked it and happily ate all of their dinner...yes, squash and all:) So, if you are looking for a way to get your kids to eat more veggies, you might want to give this recipe a try.

Click HERE for a video of how to make this dish.


Ingredients

Makes 8 servings (I only made half the recipe)

Cooking spray
1 pound elbow macaroni
2 (10-ounce) packages frozen pureed winter squash
2 cups 1 percent lowfat milk (I used 2%)
4 ounces extra-sharp Cheddar, grated (about 1 1/3 cups) (I used sharp cheddar)
2 ounces Monterrey Jack cheese, grated (about 2/3 cup)
1/2 cup part-skim ricotta cheese
1 teaspoon salt
1 teaspoon powdered mustard
1/8 teaspoon cayenne pepper
2 tablespoons grated Parmesan
2 tablespoons unseasoned bread crumbs
1 teaspoon olive oil


Preheat the oven to 375 degrees F. Coat a 9 by 13-inch baking pan with cooking spray.

Bring a large pot of water to a boil. Add the macaroni and cook until tender but firm, about 5 to 8 minutes. Drain and transfer to a large bowl.

Meanwhile, place the frozen squash and milk into a large saucepan and cook over a low heat, stirring occasionally and breaking up the squash with a spoon until defrosted. Turn the heat up to medium and cook until the mixture is almost simmering, stirring occasionally. Remove the pan from heat and stir in the Cheddar, Jack cheese, ricotta cheese, salt, mustard and cayenne pepper. Pour cheese mixture over the macaroni and stir to combine. Transfer the macaroni and cheese to the baking dish.

Combine bread crumbs, Parmesan and oil in a small bowl. Sprinkle over the top of the macaroni and cheese. Bake for 20 minutes. Then broil for 3 minutes so the top is crisp and nicely browned. Be sure the pasta is not too close to the broiler or it will burn the toppings instead of browning them.

Friday, September 18, 2009

Whole Wheat Buttermilk Pancakes


Here is a great homemade pancake recipe that I found on MyRecipes.com. I made these for dinner last night and everyone loved them. My picky-eater ate every last morsel!

I mixed up the dry ingredients and rinsed the berries earlier in the day to save time. Then, these came together in a snap! Since, it was just me and the kids, I had some leftovers. I put the extras in a Ziploc and added them to the freezer. Now, I've got breakfast (or dinner) ready for another day!

Click HERE for a video of how to make these.

Mmmmmmmmmmmmmmmmmmmmmmmm

"I *heart* pancakes and nanas!!"

Some maple syrup on top= serious YUM!


Ingredients
Makes 6 servings (12 pancakes)

3/4 cup all-purpose flour
3/4 cup whole wheat flour
3 tablespoons sugar
1 1/2 teaspoons baking powder
1/2 teaspoon baking soda
1/2 teaspoon salt
1 1/2 cups low-fat buttermilk
1 tablespoon vegetable oil
1 large egg
1 large egg white
Cooking spray
3/4 cup maple syrup
3 tablespoons butter
1/2 cup fresh berries (I used raspberries)
1 banana sliced

Preparation
Lightly spoon flours into dry measuring cups; level with a knife. Combine flours, sugar, baking powder, baking soda, and salt in a large bowl, stirring with a whisk. Combine buttermilk, oil, egg, and egg white, stirring with a whisk; add to flour mixture, stirring just until moist.

Heat a nonstick griddle or nonstick skillet coated with cooking spray over medium heat. Spoon about 1/4 cup batter per pancake onto griddle. Turn pancakes over when tops are covered with bubbles and edges look cooked. Serve with syrup, butter and fruit.
Keep cooked pancakes warm in a 200ยบ oven while preparing remaining pancakes.

WW POINTS = 7 per serving(2 pancakes, 2 tablespoons syrup, and 1 1/2 teaspoons butter)

Monday, September 7, 2009

Jambalaya


Last week, I picked up a package of andouille sausage with the idea of making jambalaya. I kept putting it off though...until tonight. This was fantastic and spicy!

Jambalaya is a traditional Louisiana dish that is cousin to the Spanish paella. I adapted my version from Elie Krieger's recipe for Jambalaya with shrimp and ham on the FoodNetwork.com.

Please note that I used some different ingredients than are in Ellie's recipe. My version has sausage (instead of ham)and celery (instead of the extra red pepper). I also used only half of the spice amounts she uses and no hot pepper sauce. Since my version already has spicy andouille in it and there was no need to add much more heat.

Check out Ellie's video on how to make this dish though. I always find visuals very helpful when cooking. Aside from the fact that I start off cooking the sausage, the rest of the steps are virtually the same.

Ingredients
1 tablespoon olive oil
1/2 large onion, diced
1 celery stalk, diced
1/2 green bell pepper, diced
1-2 cloves garlic, minced
1/2 teaspoon salt, plus more, to taste
1/4 teaspoon freshly ground black pepper, plus more, to taste
1/2 teaspoon paprika
1/4 teaspoon dried oregano
1/4 teaspoon dried thyme
1 bay leaf
1/8 teaspoon cayenne pepper
1 tablespoon tomato paste
6 ounces andouille sausage, sliced (about 2 links)
2 1/2 cups low sodium chicken broth
1 (14 1/2-ounce) can no-salt added diced tomatoes
1 cup uncooked long-grain white rice
1 pound peeled and deveined medium shrimp

Directions
Heat the oil in a large Dutch oven over a medium heat. Add the sliced sausage and cook for 8 minutes. Then add the onion,celery, pepper and garlic. Saute until they begin to soften, about another 8 minutes.
Mix in the spices,tomato paste,chicken broth and the diced tomatoes. Bring to a boil. Stir in the rice, cover, reduce heat and simmer for about 20 minutes, or until rice is done and most of the liquid is absorbed. Add the shrimp and cook, covered, for 5 minutes more, or until shrimp is cooked through. Season with salt and pepper, to taste.

Saturday, August 29, 2009

Red Velvet Cupcakes


So, as you can tell, I've been on a bit of a cupcake kick lately. This was my month to host book club and I had picked The Red Tent by Anita Diamant as our book to read. In keeping with the theme, I decided red velvet cupcakes for dessert would be perfect.

While, searching for a recipe I found this one by Paula Deen. I love Paula Deen! Red velvet is a traditional southern cake, so making Paula's was a no-brainer.

These were AWESOME!!! The cake was moist and delicious. The cream cheese frosting is a classic for these.

I ended up not actually using these for book club though. After a week of my husband being away on business, I was really needing a night out and decided instead of hosting at home (which would mean cleaning and cooking all day)I needed a night out. So, we made reservations at a great restaurant,went there instead and had a great night.

The cupcakes didn't go to waste though. I dropped this batch off at my husband's office. His ex-boss (who has a new position) was celebrating his birthday and it sounds like everyone really enjoyed them--yay!


These look beautiful, even in the oven.


Ingredients
Makes 24 cupcakes

Cupcakes
2 1/2 cups all-purpose flour
1 1/2 cups sugar
1 teaspoon baking soda
1 teaspoon salt
1 teaspoon cocoa powder
1 1/2 cups vegetable oil
1 cup buttermilk, room temperature
2 large eggs, room temperature
2 tablespoons red food coloring
1 teaspoon white distilled vinegar
1 teaspoon vanilla extract

Preheat the oven to 350 degrees F. Line 2 (12-cup) muffin pans with cupcake papers.

In a medium mixing bowl, sift together the flour, sugar, baking soda, salt, and cocoa powder. In a large bowl gently beat together the oil, buttermilk, eggs, food coloring, vinegar, and vanilla with a handheld electric mixer. Add the sifted dry ingredients to the wet and mix until smooth and thoroughly combined.

Divide the batter evenly among the cupcake tins about 2/3 filled. Bake in oven for about 20 to 22 minutes, turning the pans once, half way through. Test the cupcakes with a toothpick for doneness. Remove from oven and cool completely before frosting.


Icing

1 (8-ounce) package cream cheese
¼ cup butter, softened
2 teaspoon good vanilla
1 (1-pound) box confectioners’ sugar

Beat cream cheese and butter until smooth. Blend in vanilla. Sift powdered sugar. Gradually beat together.

I applied the icing to the cupcakes with a #4B Wilton's tip. The garnish was make by finely crumbling up half of one un-iced cupcake then adding red sugar sprinkles, to the crumbled cupcake. Sprinkle about 1 tsp. over each cupcake.

Friday, August 14, 2009

Chicken Pastina Bake


Here it is...Giada's famous chicken pastina bake! You've probably already seen this recipe on a handful of other cooking blogs and for good reason. It's tasty and very family friendly. It has chicken, pasta and cheese...who does not like that, right? Even my daughter ate it and she is definitely our picky eater.

This recipe is relatively easy to make but there is some prep work. It bakes for 30 minutes but to keep the entire cooking time under 40 minutes, I do all the prep work earlier in the day.

While my daughter naps, I dice all the veggies and chicken. I even measure out my pasta, fill a pot with water and butter up the baking dish. Then everything goes in the fridge (minus the pot) till it's cooking time.

Here is the video of Giada making this great family friendly dish.

Ingredients


1 cup pastina pasta (or any small pasta) I used mini penne
2 tablespoons olive oil
1/2 cup cubed chicken breast (1-inch cubes)
1/2 cup diced onion (about 1/2 a small onion)
1 clove garlic, minced
1 (14.5-ounce) can diced tomatoes with juice I used about 1/2 can b/c my son does not like tomatoes
1 cup shredded mozzarella
1/4 cup chopped fresh flat-leaf parsley
1/4 teaspoon kosher salt
1/4 teaspoon freshly ground black pepper
1/4 teaspoon dried oregano I added this, not in original recipe
1/4 cup bread crumbs
1/4 cup grated Parmesan
1 tablespoon butter, plus more for buttering the baking dish

Preheat the oven to 400 degrees F.

Bring a medium pot of salted water to a boil over high heat. Add the pasta and cook until just tender, stirring occasionally, about 5 minutes. Drain pasta into a large mixing bowl.

Meanwhile, put the olive oil in a medium saute pan over medium heat. Add the chicken and cook for 3 minutes. Add the onions and garlic, stirring to combine, and cook until the onions are soft and the chicken is cooked through, about 5 minutes more. Put the chicken mixture into the bowl with the cooked pasta. Add the canned tomatoes, mozzarella cheese, parsley, salt, and pepper. Stir to combine. Place the mixture in a buttered 8 by 8 by 2-inch baking dish. In a small bowl mix together the bread crumbs and the Parmesan cheese. Sprinkle over the top of the pasta mixture. Dot the top with small bits of butter. Bake until the top is golden brown, about 30 minutes.