Thursday, March 31, 2011

Flower and Butterfly Cookie Bouquet


I'm excited to share this cookie and butterfly bouquet I just made for a fundraiser at my daughter's preschool. It came out just as I had hoped and now I'm itching to make more cookie bouquets!

Here are the steps to recreate this bright and tasty dessert/display:

Step 1.
Bake a batch of your favorite sugar cookies (here is mine) with long lollipop sticks attached. Decorate with royal icing (here is the recipe and link to instructions) and let dry completely.


Step 2.
Wrap each cookie in a cookie bag and tie with a ribbon. I went with green to imitate leaves on a flower.


Step 3.
Fit Styrofoam rounds into a pot or vase. You will want a snug fit, so you may need additional materials or need to trim Styrofoam to achieve this. Insert a wooden skewer into the center of the Styrofoam and push all the way down to secure each round (my pot had 3 rounds).


Step 4.
Add Easter grass in between the pot and Styrofoam gaps.


Step 5:
Starting from the back, insert flowers pushing down through the Styrofoam. Finally, add more grass to cover the Styrofoam.


Tada...you did it!

I love this polka-dot butterfly :)


Finally, you can wrap the entire bouquet in a clear gift bag and finish off with a pretty bow.

Tuesday, March 29, 2011

Buttermilk Ranch Dressing


Here is another great recipe to use up some of those fresh chives that have grown back from last year. This fresh buttermilk ranch dressing is so easy to make and tastes delish! I love it on salad, with chicken, for dipping french fries and carrot sticks...on lots of things!


As I mentioned in my last post, both of my kids LOVE to help me in the kitchen. So, I had them combine all of the dressing ingredients in a bowl before I gave it a quick pulse in the food processor.

Having them be actively part of the cooking process really helps me with dinner time pickyness. They are generally eager to eat (or at least try) something they helped make...even when there are vegetables involved!


"We love carrots and lettuce with homemade ranch!!!!"


"YUM!!"


Ingredients:

3/4 cup mayonnaise
3/4 cup sour cream
1 Tbsp olive oil
1 Tbsp lemon juice
1/4 to 1 cup buttermilk (depending on how thick you want it, I used 3/4 cup)
1 small bunch of chives
Small handful of parsley
1 clove garlic
salt, pepper

Directions:

Place all ingredients with 1/4 cup of buttermilk in a blender and blend for 10 seconds. Check consistency and blend in additional buttermilk if desired. Less buttermilk for dipping, more for dressing. Store in an air-tight jar in the fridge.

Source: adapted from Confections of a Foodie Bride, originally from The Gourmet Cookbook, 2004

Sour Cream and Chive Mashed Poatoes


Are you tired of the same old boring mashed potatoes? If so, here is a quick and easy update that not only tastes great but looks pretty on your plate too.

I decided to make sour cream and chive mashed potatoes earlier this week and I'm glad I did! This creamy, velvety side dish was delicious and so easy to make.

(excuse the blurry picture)


The simple recipe just requires you to add sour cream, milk, a little butter and the chives to boiled, fork tender potatoes. If you have kids who love to help in the kitchen (I have two excellent and enthusiastic helpers) this is a great recipe for them. My son was so proud of making these with me and said that they tasted like they came from a restaurant...:)


Ingredients:


2 pounds Yukon Gold potatoes, peeled and quartered
1/2 cup milk
1/2 cup sour cream
2 Tbsp unsalted butter
1/4 cup chopped fresh chives
salt and pepper to taste

Directions:

Place potatoes in a large pot with enough water to come up 2 inches from the bottom. Bring to a boil, and cook for 20 to 25 minutes, until fork tender. Drain, and mash. Mix in the milk using a potato masher or an electric mixer until fluffy. Stir in the sour cream, butter and chives, and season with salt and pepper.

Source: Adapted from All Recipes

Sunday, March 27, 2011

Cupcake Challenge


What a fun weekend I had! This past Saturday, I competed in a "Cupcake Challenge" as part of the National Capital Area Cake Show. The challenge featured 50 bakers (both professional and amtuer) and almost 200 different varieties of cupcakes.

The theme for this year's challenge was "cocktail" inspired cupcakes. Here is what I made:

Grasshopper Cupcake (rich chocolate cake with creme de menthe buttercream)

Blue Hawaiian Cupcake (coconut cake with a rum buttercream frosting, graham cracker "sand" and a fondant flip flop garnish)

Shirley Temple Cupcake (lemon-lime cake with a cherry grenadine buttercream)

I'm glad I took some pictures at home before the show b/c we were so busy and didn't get to take many while there.

My neighbor, Polly, also competed in the challenge. Polly and I both love to bake and since we often get requests for baked goods we've decided to join forces and start a home baking business. This is our website, Sugar Lane Sweets*.

These were Polly's cupcakes:

Orange Blossom Cupcake (my favorite...loved these!)

Irish Cream Cupcake

Chocolate Cherry Cordial Cupcake


This event was sold out about a week before the show. When the doors opened at 7PM hundreds of people filed in to purchase cupcakes. It was crazy, busy, overwhelming and a lot of fun!


Polly working her table.


I didn't get a chance to snap any pictures of my set-up before the show. I took this picture half-way through the event. By this point, my grasshopper cupcakes were almost gone and 15 minutes later my Shirley Temple cupcakes were also sold out.

Some people had some pretty neat displays.


And there were a lot of creative and amazing cupcakes.


The Washington DC area loves cupcakes!


Look at these cute "Tartini" cupcakes.


Another great display.


* Polly's husband, CJ, built our site. If you would like to contact him about any website work, feel free to send me (mbrandao0508@gmail.com) and I will forward his info.

Wednesday, March 23, 2011

Salsa Chicken (Slow Cooker)


I know this dish probably doesn't look that appetizing but you have trust me on this one. In fact, I think you should bookmark this page if you like the following: chicken, Mexican flavors and your slow-cooker. This is the very popular (at least in the food blog world) SALSA CHICKEN!

Who knew chicken breasts + can of cream of chicken soup+ taco seasonings + sour cream could be so good. I know I sure didn't. I had seen this recipe so many times but it just did not sound that appealing. Of course, everyone raved about it, hence it's popularity.


Well, I'm so glad I tried it too b/c it really is so tasty....and easy!! If you have already made this dish, please feel free to leave your review below. THANKS!

Ingredients:

1 pound boneless skinless chicken breasts
1 can cream of mushroom or cream of chicken soup (I used the cream of chicken)
1 cup salsa
1 package taco seasoning (I used 1 Tbsp of my homemade taco seasoning)
1 cup sour cream
cilantro, for serving (optional) (I also added a little shredded cheddar-jack, black beans and scallion on top)

Directions:

Put chicken, soup, and salsa in slow cooker. Sprinkle taco seasoning over everything. Cook on low for 6 hours. If shredding the chicken, pull the breasts out and shred; return back to slow cooker. Stir in sour cream and heat just until everything is combined.

Source: Fake Ginger

Monday, March 21, 2011

Rustic Roasted Tomato and Garlic Salsa


I spotted this recipe on another blog early last week and couldn't wait to try it. My regular go-to salsa is AWESOME but I wanted to try this one because of the technique of pan roasting the jalapeno pepper and garlic.

This salsa did need a little adjusting for me, mainly because of the spiciness. I've realized I'm more of a mild salsa kind of girl. But that is the great thing about salsa. If you make a batch following a recipe and it isn't to your tasting, simply add a little more of what is missing. If too much spice is the problem, just add a little more tomato to mellow out the heat. Chances are you will not have a problem with the extra amount of salsa you just made :)


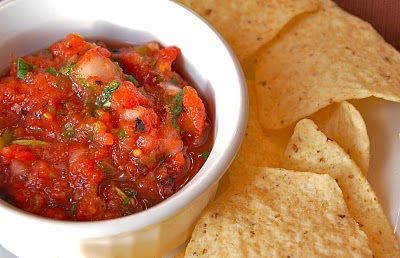
Homemade salsa is so much better than anything you can buy in a jar. The fresh cilantro makes it so good! Which reminds me... I can't wait to start planting my herbs this season. I actually know very little about gardening but I sure do love having fresh herbs on hand. I typically grow cilantro, basil, parsley, mint, rosemary,chives, oregano and dill.

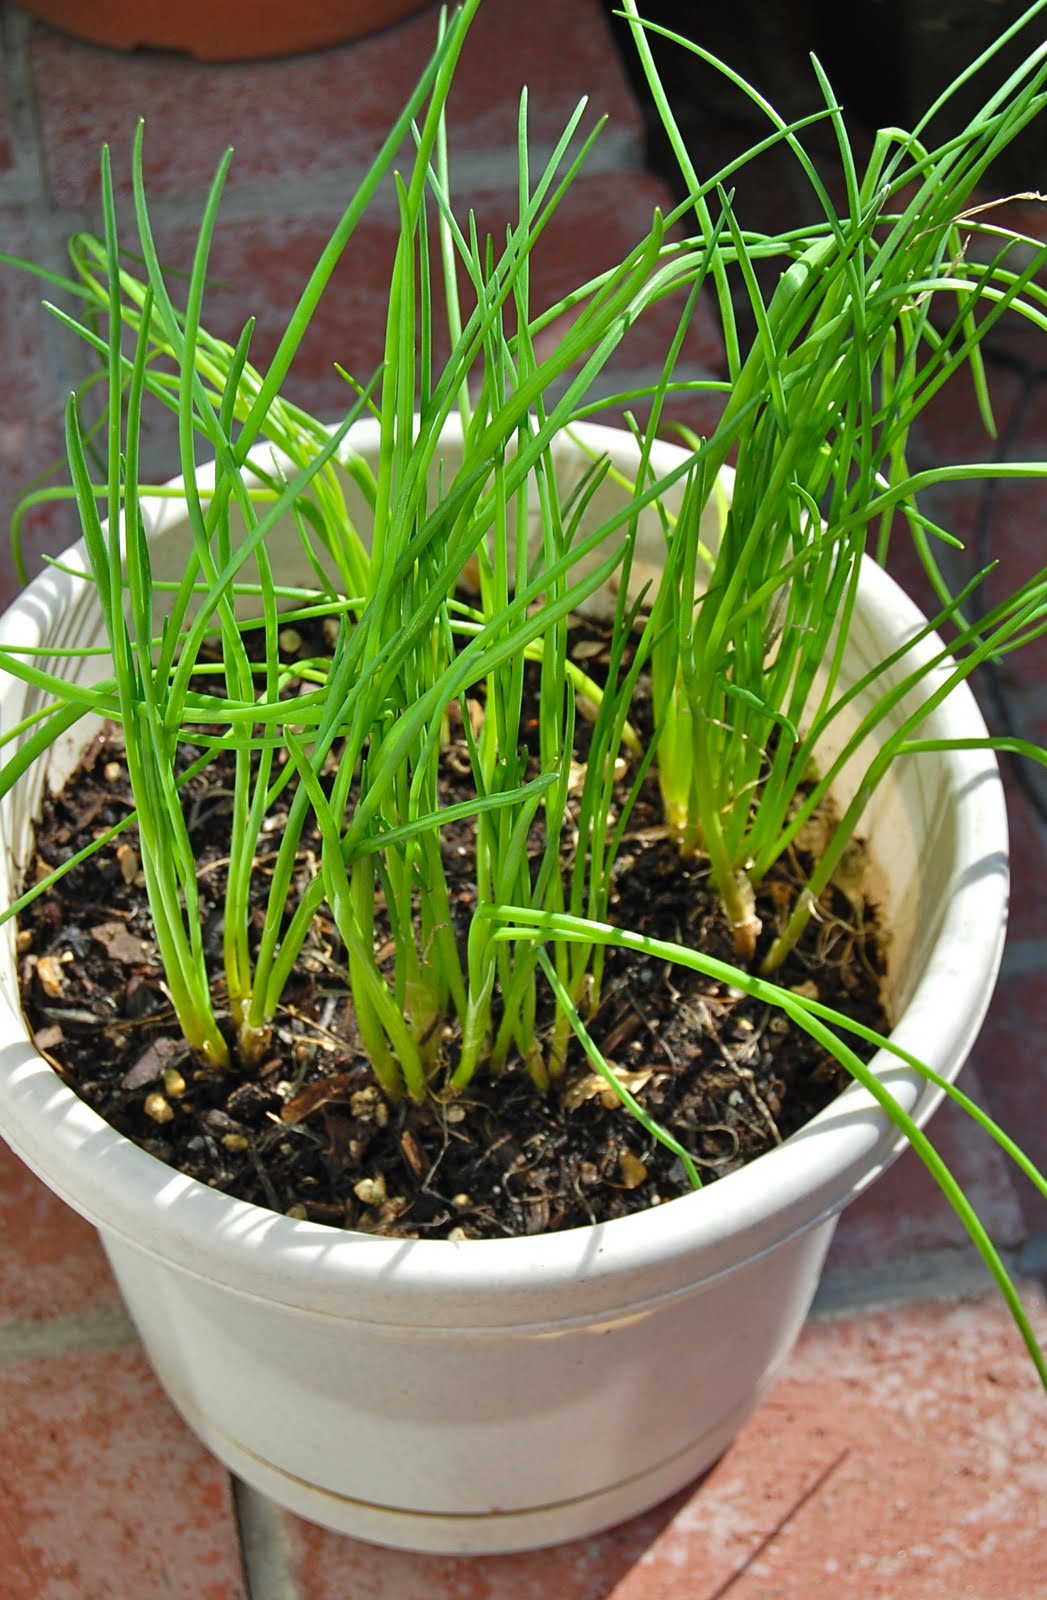
Here are some pictures from last year's mini harvest.

basil


mint


chives


parsley


I love flat leaf parsley. I use it in so many recipes and as a garnish. Plus, this hearty plant usually lasts for me till mid-December...not bad for a little packet of seeds.


Ingredients:


2 fresh jalapeño chiles (or 4 serranos, 1 or 2 habaneros or practically any fresh chiles)
2 cloves garlic, unpeeled
1/2 cup finely chopped white onion
1 15-oz can diced tomatoes in juice (preferably fired-roasted)
1/3 cup (loosely packed) roughly chopped cilantro
Lime juice to taste
Salt

Directions:

Set a small skillet over medium heat. Lay the chiles and garlic in the skillet and dry-roast until soft and blotchy black in spots, about 10 minutes for the chiles, about 15 minutes for the garlic.

While the chiles and garlic are roasting, scoop the chopped onion into a strainer and rinse under cold water. Shake off the excess water and pour into a medium bowl.

Pull the stems off the chiles and peel the papery skins off the garlic. Scoop them into a food processor and pulse until they are finely chopped. Add the tomatoes, with their juice, re-cover and pulse a few more times, until the mixture is as coarse or smooth as you want your salsa to be.

Pour the tomato mixture into the bowl with the onion. Add the cilantro and stir thoroughly. Thin with a little water if necessary to give the salsa an easily spoonable consistency. Taste and season with the lime juice and salt (usually about 1/2 tsp). If not serving within an hour or two, cover and refrigerate. If you don’t plan to serve it within a few hours, wait until you’re ready to serve the salsa before adding the onions and cilantro.


Source: Smells Like Home, originally from Rick Bayless, Mexican Everyday

Wednesday, March 16, 2011

My Little Pony Cake (s)


My daughter celebrated her birthday with friends at our local My Gym (which we LOVE, LOVE!). This was actually a joint party for her and one of her best friends. The girls are in the same preschool class, her mom and I are good friends and their actual birthdays are only a day apart. So, doing a joint party worked out perfectly!

We decided to make a My Little Pony cake for the girls because they play with the ponies at school all the time. I was inspired to make two cakes joined together by a rainbow from this picture on Flickr.


Most of the cake was pretty simple to make but the rainbow gave me some trouble. The final rainbow I used was version #4!


The birthday girls sharing a giggle :)


And blowing out their candles.


The inside of this basic vanilla cake was a chocolate mousse filling. Next time I will definitely add some more because it was yummy!!


To see more pictures of this cake and the party, check out my Facebook page....the link is on the right-hand side bar.

Tuesday, March 15, 2011

Strawberry Shortcake Cake


My daughter really wanted a Strawberry Shortcake cake for her birthday and this is the cake I created. We had this cake at home the night of her actually birthday.

I found the Strawberry Shortcake figures on clearance at my local grocery store a few months ago and knew these would be perfect!


She loved it just like she loved last year's cake. You can check that one out HERE. She still talks about that Belle cake today!

A close up of Orange Blossom. Yes, Strawberry and her friends have gotten a bit of a makeover since we were kids...they're quite sassy looking these days, huh?


It's a little hard to tell the scale of this cake from the pictures but it was actually pretty small. Since it was only going to be a few of us eating it I used the smallest cake pans I had, a 4 inch and a 6 inch. I learned that frosting such small cakes is much harder than frosting a big cake.


After cake, she got to open her gifts. My dad got her this "big girl" bike...she was so excited!

Monday, March 14, 2011

Birthday Mini Cupakes


This week's posts are going to be all about my daughter's birthday treats. Thats right, she gets multiple cupcakes/cakes (as does her brother) for her birthday. We always end up celebrating the kid's birthdays 3 times. Once at school, then at home for a family party on their actual birthday and finally with a big party on the weekend with their friends. It's a lot but both kids truly love it and for me it's worth the trouble.


So, here are the mini cupcakes with number "3" fondant toppers I made for my her preschool class. The teachers at her school do not like parents to bring in treats with a lot of frosting (especially colored frosting) because the kids usually make a huge mess with these. And I agree. Plus, they don't really need to be eating that much sugar at 10 AM. These minis were a great way to celebrate without going overboard.


Yum! Here she is enjoying her treat with her good friends.


I can't believe she is three...it seems like this was only the other day-sigh...