
My daughter celebrated her birthday with friends at our local My Gym (which we LOVE, LOVE!). This was actually a joint party for her and one of her best friends. The girls are in the same preschool class, her mom and I are good friends and their actual birthdays are only a day apart. So, doing a joint party worked out perfectly!
We decided to make a My Little Pony cake for the girls because they play with the ponies at school all the time. I was inspired to make two cakes joined together by a rainbow from this picture on Flickr.
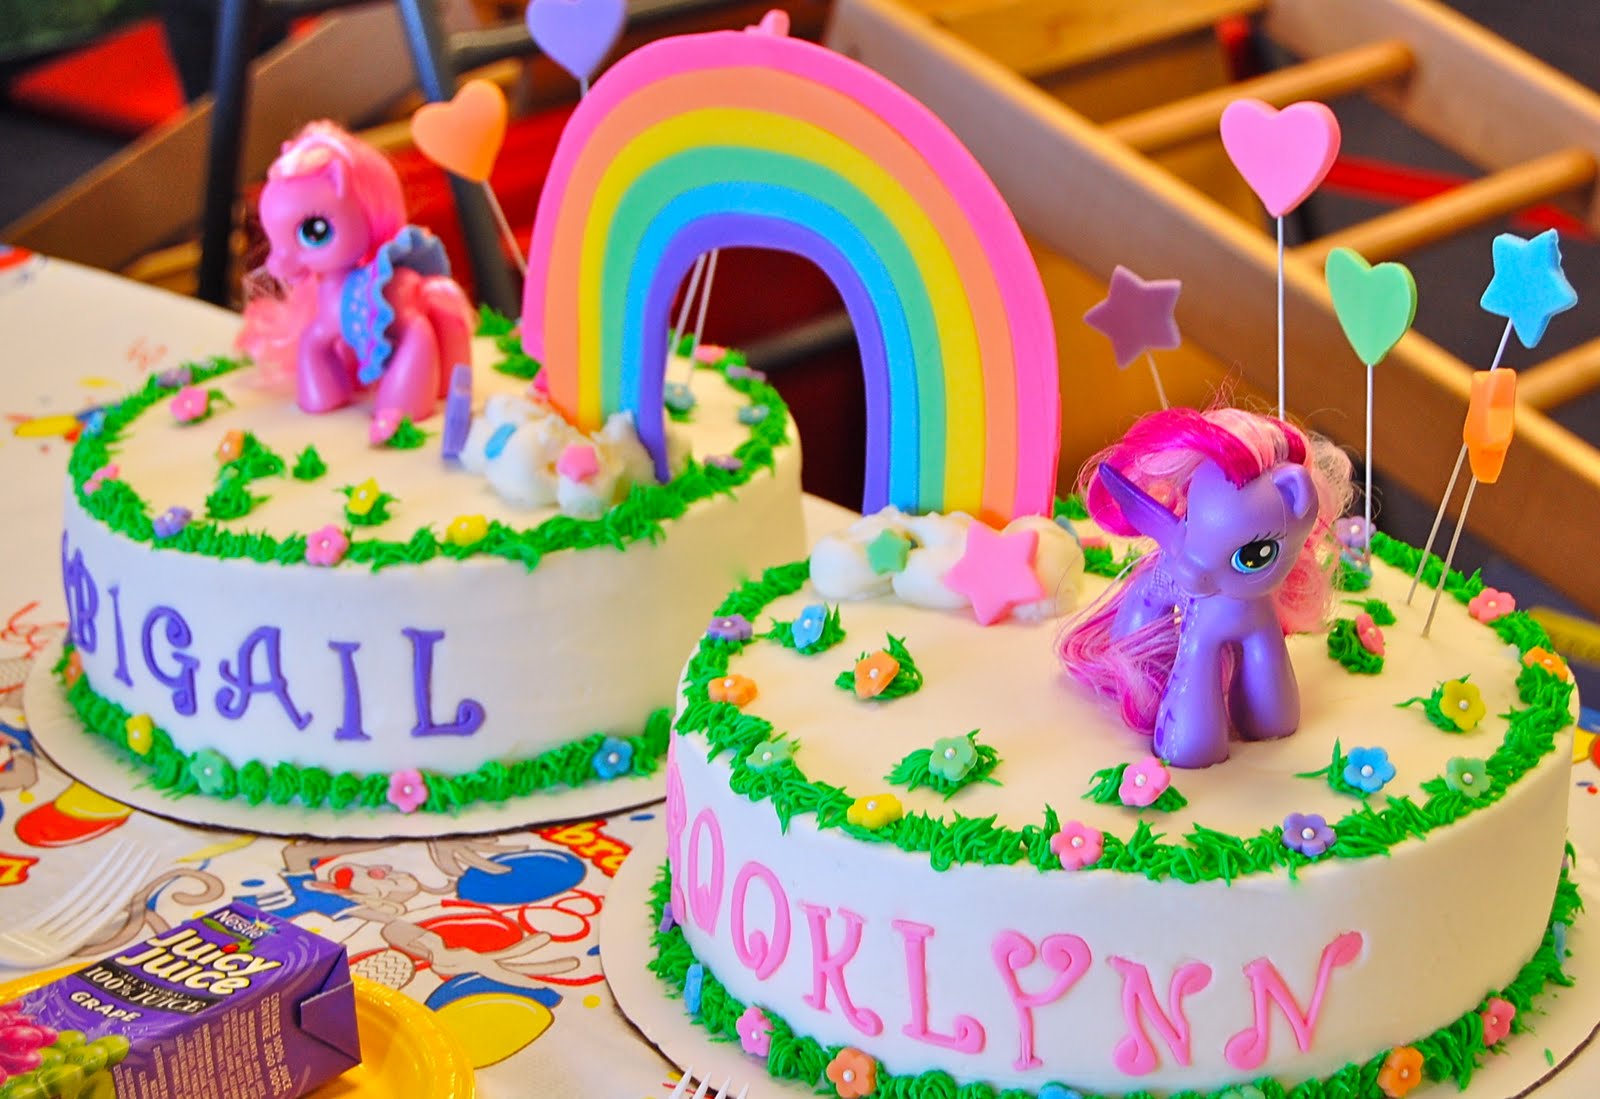
Most of the cake was pretty simple to make but the rainbow gave me some trouble. The final rainbow I used was version #4!

The birthday girls sharing a giggle :)

And blowing out their candles.

The inside of this basic vanilla cake was a chocolate mousse filling. Next time I will definitely add some more because it was yummy!!

To see more pictures of this cake and the party, check out my Facebook page....the link is on the right-hand side bar.
Between her Strawberry Shortcake cake and this My Little Pony cake, it looks like your daughter had a very special birthday! :)
ReplyDeleteOh, and I like your version of the cake so much better than the 'inspiration' cake :)
ReplyDeleteI'm putting in my order for a My Little Pony cake today, Emily turns 5 in September. :D
ReplyDeleteThat is the cutest, most creative one yet!
Great job, as usual. Love your colors.
ReplyDeleteAdorable!
ReplyDeleteThats so cute! I'm in college and I'd love a my little pony cake still :) great blog
ReplyDeletehttp://princessedemiel.blogspot.com/
How did you do the letters? Where did you get the stencils?
ReplyDeleteThey were made with fondant and these Tappits cutters:
ReplyDeletehttp://www.amazon.com/Upper-Alphabet-Number-Tappit-Cutters/dp/B002INR2OE/ref=sr_1_3?ie=UTF8&qid=1300763294&sr=8-3
Look on YouTube for videos to get some tips on how to use these or you might be very frustrated.
Very cute cake! My daughters saw the picture and truly loved it!...one question, how did you make the Rainbow and how did you make it "stand" up on the cake?
ReplyDeleteThe rainbow is all made out of fondant. This was definitely that toughest part of making this cake and took me four tries to get it right. Here are the basic steps:
ReplyDelete1. Start to make this a week before you need it.
2. Color the fondant rainbow colors.
3. Cut out a rainbow shaped piece of fondant and then attach the colored rainbow layers to that. You can use a very little amount of water to glue everything together.
4. Leave the rainbow out for 2-3 days to dry out and stiffen up.
5. The rainbow will stand up easily b/c it will be stiff. Make some frosting clouds to help anchor the rainbow.
how do you make the clouds with the frosting?
ReplyDeleteWith a plain large round tip.
DeleteWhat sort of sticks did you use to get the heart and star shapes elevated. I have been trying to figure it out without any luck. My almost two year old has her heart set on this cake. It is so cute! Thanks in advance.
ReplyDeleteI used white floral wire like this:
Deletehttp://www.amazon.com/26-White-Covered-Floral-Wire/dp/B00086IAO4/ref=pd_sim_hg_19
I got it at a cake supply store but I'm sure you could find it elsewhere. I dipped the end (that I stuck in the cake) in white chocolate to make it food safe.