Showing posts with label Cookies. Show all posts

Friday, April 6, 2012

Polka Dot Tulip Sugar Cookies


I have so many terrific recipes to share with you all but just haven't had the time to get those posts done. However, I did want to quickly share these Easter inspired polka-dot tulip sugar cookies.

I used my regular sugar cookie and royal icing recipe. The only changes I made was to swap out the vanilla extract for lemon extract and lemon zest. I love the flavor of lemon in desserts and it seemed especially suitable for these spring-time treats.


The cookies were made for my daughter's preschool Easter program. Everyone seemed to really enjoy them. For more pictures, check out my Facebook page (link on the right-hand side).


Happy Easter!!

Wednesday, December 21, 2011

Nutty Reindeer Treats


Here is another holiday treat I made recently. I saw these on another blog and thought....HOW CUTE!!!

These were made for my daughter's preschool Christmas pageant luncheon. I really would have liked to have taken step-by-step photos but I made these the night before and was in a bit of a rush. They are made with a Nutter Butter cookie that is dipped in chocolate (I brushed on the chocolate), then decorated with a red M&M for the nose, candy eyes* and pretzels for antlers.

Please click HERE for instructions on how to make these.

My little angel (center with the red hairband) performing in the school's annual Christmas pageant.


The kids loved these!!


I individually wrapped each reindeer in a cookie baggie and tied it with a festive ribbon. This kept the cookies fresh and made them an easy take-home treat.


*These are the candy eyes. You can find them at a store like Michaels.

Sunday, December 18, 2011

White Snowflake and Christmas Tree Sugar Cookies


I still owe you all the second slow-cooker mushroom chicken recipe but I'm holding off on that for a bit, so I can bring you some holiday goodies instead :)

I made these snowflake and Christmas tree cookies for my neighbor's annual cookie exchange party. I knew there were going to be some amazing tasting treats at the party, but I decided to good for looks mostly this year...and these fit the bill!


I used my regular sugar cookie and royal icing recipe.

I was given a sample of Dave's Dirty Vanilla to try out and used it in this recipe. So, why is it called "dirty vanilla"? Well, Dave was frustrated with the sub-par vanilla extracts he was using for baking and after much experimenting developed a cold extraction process that yields a vanilla with more subtle flavors and aroma. There is a Madagascar Bourbon vanilla bean in each bottle of Dave's Dirty Vanilla! I loved the "dirty" part....the little specks of vanilla seed! To learn more or buy some of Dave's Dirty Vanilla visit his site HERE.


I think the all white cookies look so pretty and sophisticated but the really reason I made them this way was out of sheer laziness-LOL. I didn't want to have to mess with making several different colors for the frosting.


My daughter appreciated both the look and taste of these cookies :)

Saturday, September 24, 2011

Soft Chocolate Chip Cookies


I should probably have called these "The Best Chocolate Chip Cookies Ever" or "My Favorite Cookie" because these really are that good....really!

What makes them so good? The fact that they taste like the perfect chocolate chip cookie and they are SOFT! What makes them soft? The surprise ingredient is vanilla pudding. Most CCC recipes will produce cookies that might be soft just after baking, but after a few hours they will become crispy. These stay soft not only for hours but also till the next day (remember to keep in a sealed Tupperware container to keep fresh like any other cookies though). I'm sure they would stay soft for a few days, but these didn't last that long in my house :)


I have to share with you my "behind the scenes" look at how I got the above photos. The day I baked these it was very rainy and cloudy. There was very little natural light shining through the window. I had to try and get them as close to the window as possible if I wanted a decent shot. So, while one would assume from the pictures above the cookies are sitting on a table, they are actually on top of my kids chair and a dinning room chair. I have a feeling I'll be using this set-up a lot more as it continues to get darker out.


Ingredients:

4 1/2 cups all-purpose flour
2 teaspoons baking soda
2 cups butter, softened
1 1/2 cups packed brown sugar
1/2 cup white sugar
2 (3.4 ounce) packages instant vanilla pudding mix
4 eggs
2 teaspoons vanilla extract
4 cups semisweet chocolate chips
2 cups chopped walnuts (optional)

Directions:

Preheat oven to 350 degrees F (175 degrees C). Sift together the flour and baking soda, set aside.
In a large bowl, cream together the butter, brown sugar, and white sugar. Beat in the instant pudding mix until blended. Stir in the eggs and vanilla. Blend in the flour mixture. Finally, stir in the chocolate chips and nuts. Drop cookies by rounded spoonfuls onto ungreased cookie sheets.
Bake for 10 to 12 minutes in the preheated oven. Edges should be golden brown.

Source: AllRecipes.com

Tuesday, July 19, 2011

Snickerdoodles


It has been a busy, busy week and not much time for blogging. However, I did want to share this quick cookie recipe with you all.


These were terrific and I can't wait to make them again....YUM!!!


Ingredients

1/2 cup butter, softened
1/2 cup shortening
1 1/2 cups white sugar
2 eggs
2 teaspoons vanilla extract
2 3/4 cups all-purpose flour
2 teaspoons cream of tartar
1 teaspoon baking soda
1/4 teaspoon salt
2 tablespoons white sugar
2 teaspoons ground cinnamon

Directions

Preheat oven to 400 degrees F (200 degrees C).
Cream together butter, shortening, 1 1/2 cups sugar, the eggs and the vanilla. Blend in the flour, cream of tartar, soda and salt. Shape dough by rounded spoonfuls into balls.
Mix the 2 tablespoons sugar and the cinnamon. Roll balls of dough in mixture. Place 2 inches apart on ungreased baking sheets.
Bake 8 to 10 minutes, or until set but not too hard. Remove immediately from baking sheets.


Source: AllRecipes.com

Thursday, July 7, 2011

Daisy Cookie Basket


You might have noticed that I've developed a thing for cookie baskets. I first made THIS one and shortly thereafter THIS other one. Yep, I love'em :)


I made these simple daisy baskets as a little Thank You gift for my son's kindergarten teachers. One had mentioned to me recently how he was always telling them about the things I was baking. I couldn't resist baking a little something for them also, especially since they were all such amazing teachers.


I had purchased the galvanized pails at Michael's back in the Spring but I didn't actually start on the cookies till 9:30 the night before I dropped them off---eeks! It worked out OK though. I made 4 of these cookie bouquets (teacher, assistant teacher, special ed. teacher and OT) and it took me about 2.5 hours total from start to finish.


Sugar Cookie Recipe (I cut down on the vanilla extract and added lemon extract and a tsp. of fresh lemon zest)

Royal Icing Recipe (also flavored with lemon extract)

Cookie Basket Instructions

Printable "Thank You" tags (curtesy of Skiptomylou.org)

Saturday, July 2, 2011

Fourth of July Fireworks Cookies


Do these cookies look familiar? You might have seen them at the checkout counter recently. They are on the cover of the Martha Stewart Living magazine July issue. I think they are really cute and festive. I made these in advance for a BBQ I'm going to on Monday.


I also made a few simple stars outlined in red and blue with a little sanding sugar on top.


BTW, here is how I use and store my royal icing. I love these piping bottles from CK. I buy mine at a local bakery supply shop but you can also purchase them through Amazon. Also, so the tips don't dry out, I store the bottles upside down in a large cup with a damp paper towel on the bottom when I'm decorating the cookies.


I hope everyone has a safe and happy JULY 4TH!!!


Ingredients:

FOR THE COOKIES
4 cups all-purpose flour, plus more for surface
1 teaspoon baking powder
Coarse salt
2 sticks unsalted butter, room temperature
2 cups sugar
2 large eggs
2 teaspoons pure vanilla extract

FOR DECORATING THE COOKIES
Red, White, and Blue Royal Icing (HERE is my royal icing recipe)

Directions:

Make the cookies: Sift flour, baking powder, and 1/2 teaspoon salt into a large bowl.

Beat butter and sugar with a mixer on medium-high speed until pale and fluffy, about 3 minutes. Beat in eggs, 1 at a time. Reduce speed to low. Add flour mixture, then vanilla. Refrigerate dough, wrapped in plastic wrap, for at least 1 hour.

Preheat oven to 350 degrees. Roll out dough to a scant 1/2-inch thickness on a floured surface. Cut out cookies using a 1 3/4-, 2 1/4-, 2 3/4-, or 3 1/2-inch round cookie cutter, rerolling scraps once. Transfer to a baking sheet. Refrigerate until firm, about 30 minutes.

Bake until edges just start to brown, 10 to 12 minutes or until edges become golden. Transfer cookies to a wire rack, and let cool completely.

Decorate the cookies: Pipe an outline of white icing around edge of 1 cookie, leaving a 1/4-inch border, then "flood" with more white icing to cover.

Immediately pipe a red or blue dot in the center of cookie. Then pipe concentric rings of colors around the center dot (using the same color as the dot, or alternating colors).

Immediately drag a toothpick through the colors to create bursts, starting from the center dot and working toward the edge, then alternate dragging inward and outward as you work around the cookie. (Or drag around the cookie in 1 direction or curve the lines for a pinwheel effect.) Let dry. Repeat with remaining cookies and icings.

Source: Slightly adapted fromMartha Stewart

Monday, May 23, 2011

Thank You Teacher Cookies


Here we are in May and another school year is quickly coming to a close. My daughter actually finishes preschool this week and my son will be done in three short weeks. They have both had a great year and wonderful teachers. I am so grateful for all the hard work, dedication and patients they have showed my children. We have been very blessed. Both of my kids have learned and grown so much!

For example, here is my daughter singing the "Continents" song. My 3-year old can name the continents....love it!


Every year, I give the teachers an end-of-the- year thank you gift. This year I think I will make them some personalized sugar cookies that they can enjoy and share with their families. These apple cookies are similar to what I will be making. I actually made these a few weeks ago for a teacher appreciation week order.


The cookies were green apples (instead of red) because the school colors are yellow and green.


I also made 6 dozen cupcakes for this order. Aren't the school themed toppers cute?

Monday, April 11, 2011

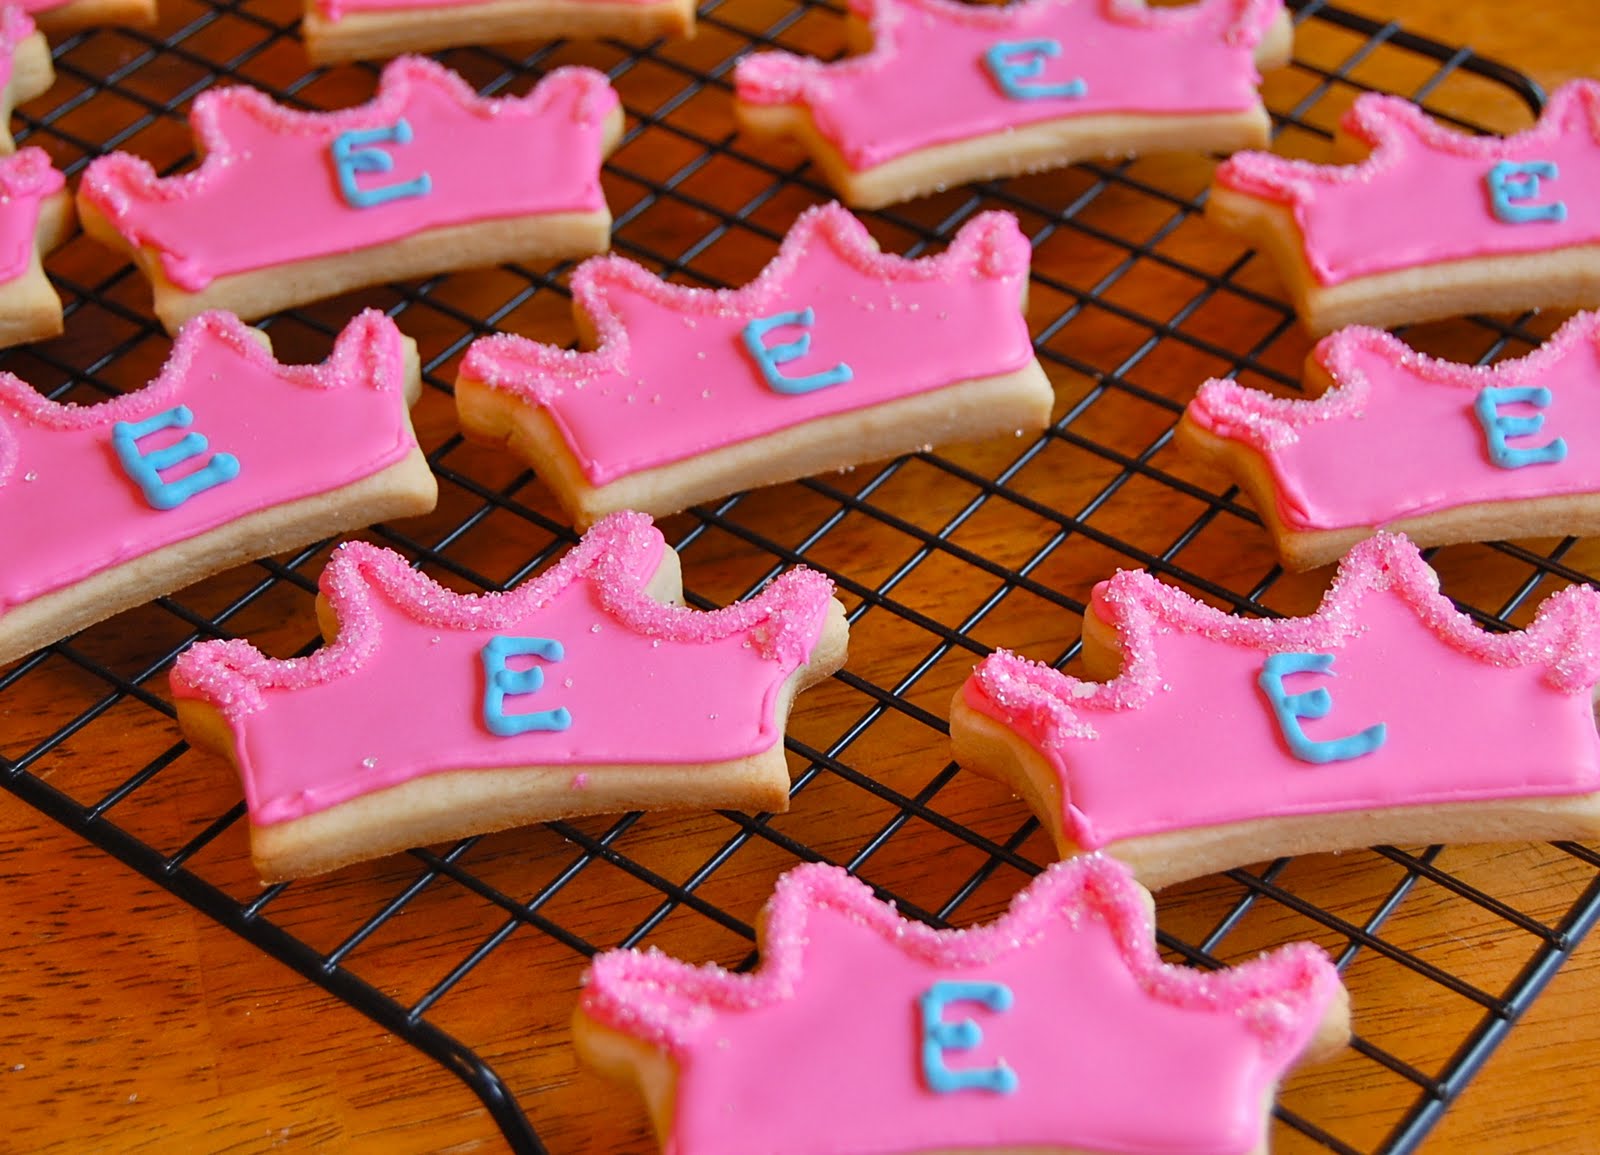
Princess Crown and Magic Wand Sugar Cookies


Along with the princess castle cake, I also made these sugar cookies for the birthday party.


Here is the sugar cookie and the royal icing recipe I use.


Sweet and simple!

Thursday, March 31, 2011

Flower and Butterfly Cookie Bouquet


I'm excited to share this cookie and butterfly bouquet I just made for a fundraiser at my daughter's preschool. It came out just as I had hoped and now I'm itching to make more cookie bouquets!

Here are the steps to recreate this bright and tasty dessert/display:

Step 1.
Bake a batch of your favorite sugar cookies (here is mine) with long lollipop sticks attached. Decorate with royal icing (here is the recipe and link to instructions) and let dry completely.


Step 2.
Wrap each cookie in a cookie bag and tie with a ribbon. I went with green to imitate leaves on a flower.


Step 3.
Fit Styrofoam rounds into a pot or vase. You will want a snug fit, so you may need additional materials or need to trim Styrofoam to achieve this. Insert a wooden skewer into the center of the Styrofoam and push all the way down to secure each round (my pot had 3 rounds).


Step 4.
Add Easter grass in between the pot and Styrofoam gaps.


Step 5:
Starting from the back, insert flowers pushing down through the Styrofoam. Finally, add more grass to cover the Styrofoam.


Tada...you did it!

I love this polka-dot butterfly :)


Finally, you can wrap the entire bouquet in a clear gift bag and finish off with a pretty bow.

Monday, December 20, 2010

Snowflake Sugar Cookies


I made these snowflake sugar cookies for my daughter's preschool Christmas show luncheon. They were very appropriate too since the day before the show we got a good amount of snow here in the DC area.


I had also planned to make some cute Santa cupcakes I had seen on Spring Lake Cakes but due to the snow, we weren't sure the show or luncheon would be happening. The thought of having 40+ Santa cupcakes at home was a little scary, so I decided to just keep it simple and stick with the cookies.

I wrapped them individually to keep them fresh and also so people could take them home easily.


For the cookie and royal icing recipe, click HERE.

I have to share some pictures of my daughter from the Christmas show. She was a little lamb :)


She is only 2.5 yrs. old so I wasn't really sure what to expect but she did great...all the kids did!


I was so proud of her!!


Me and my girl.....love, love, love her!!

Monday, December 13, 2010

Snowman Sugar Cookies


Cute sugar cookies....part deux!

These cuties were inspired by the snowman cookies I saw on Spring Lake Cakes. I think their cookies are actually much cuter, with rosy cheeks (I forgot to add that) and wonderful detailing on the hat. I was still very pleased with how these turned out though. I'm even thinking of making a mini version for my daughter's preschool Christmas pageant later this week if time allows.


I really love how the little snowflake looks on the hat. I got this package of edible snowflakes at my local Rite Aid and have used them on all sorts of winter related treats....cookies, cupcakes and cakeballs. They don't really taste like much and the texture is a little odd. They are made out of rice starch and feel very dry. However, for decorating and for $1.99 I couldn't pass these up!


For the sugar cookie and royal icing recipe, click HERE.

Source: decoration inspired by Spring Lake Cakes